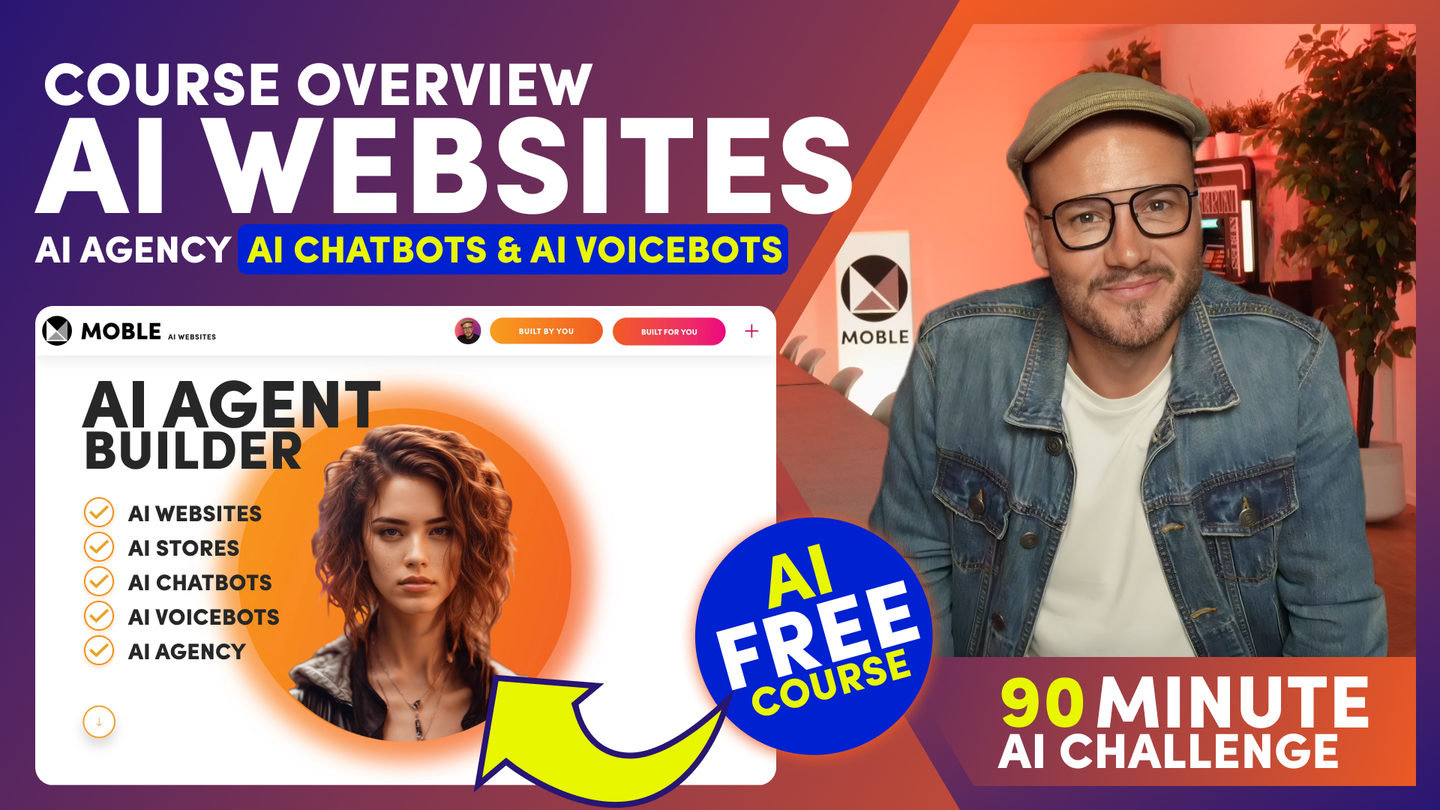
PICK YOUR AI THEME TO GET STARTED
DEPLOY YOUR AI CHATBOT
The Deploy Chatbot page is where you choose your AI Agent, set the embed style, preview the design, and copy the embed code to place your Chatbot on any website page—popup, embedded, header, hero, or a full chat dock experience.
You’ll find Deploy inside AI Agents → AI Settings. It’s designed to make going live frictionless, while still giving you full control over how your Chatbot looks and behaves on your site.

WHAT IT DOES
The Deploy area inside AI Settings generates the embed code you need to place your Chatbot on your website. It lets you:
- Select which AI Agent to deploy (or deploy an Agent Swarm).
- Control Width and Iframe Height presets (Min / Mid / Max).
- Preview and optionally override Theme Colours (background, agent, accent colours, etc.).
- Choose a Chatbot Embed Type (Blocks, Layouts, Dock, Popup, Drawer).
- Copy a live-updating Embed Code you can paste into any page or CMS.
This is also your final pre-launch checkpoint—confirm the Chatbot looks perfect across devices before you go live.
WHERE TO FIND IT
- Click AI Agents.
- Click AI Settings in the top bar.
- Scroll to Deploy.
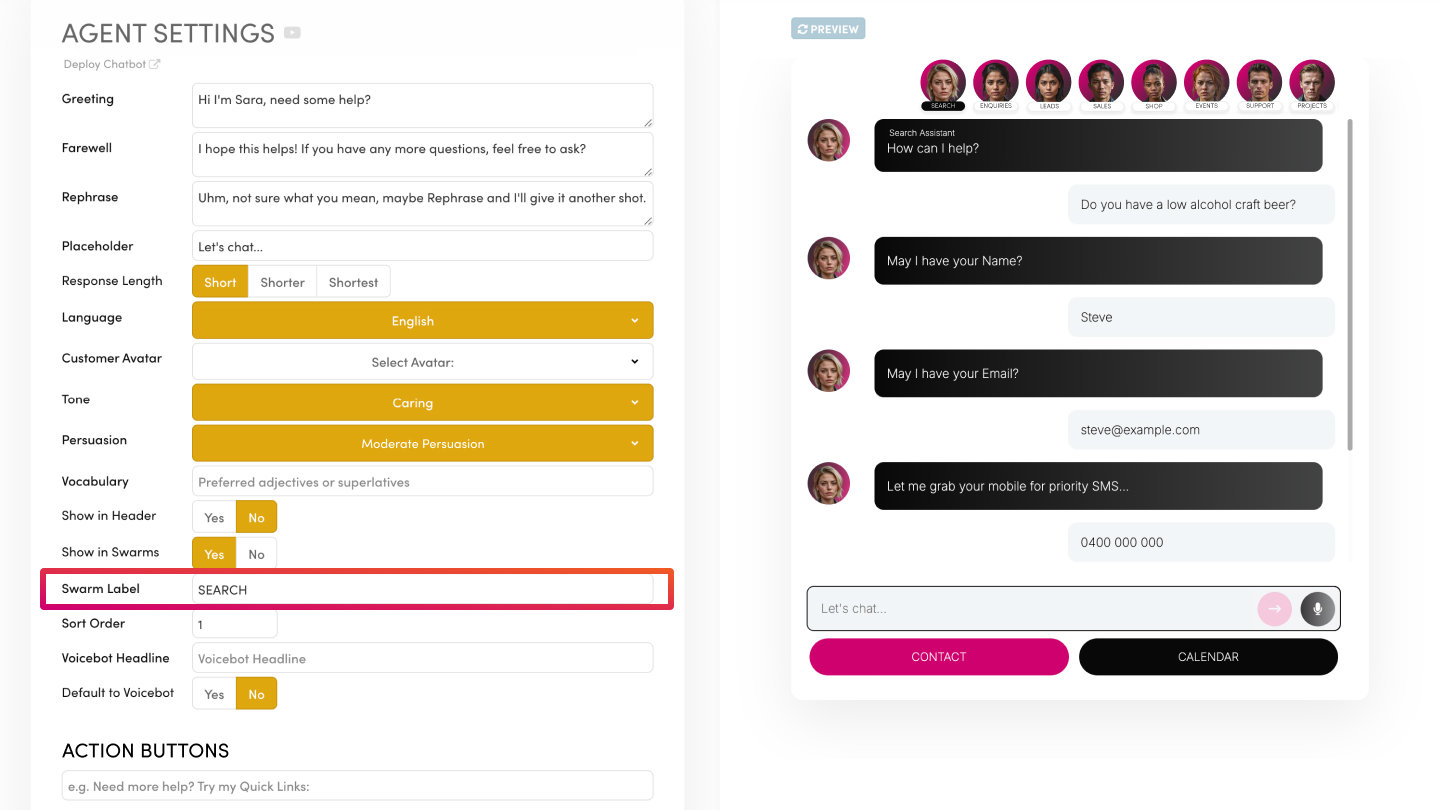
DEPLOY SETTINGS EXPLAINED
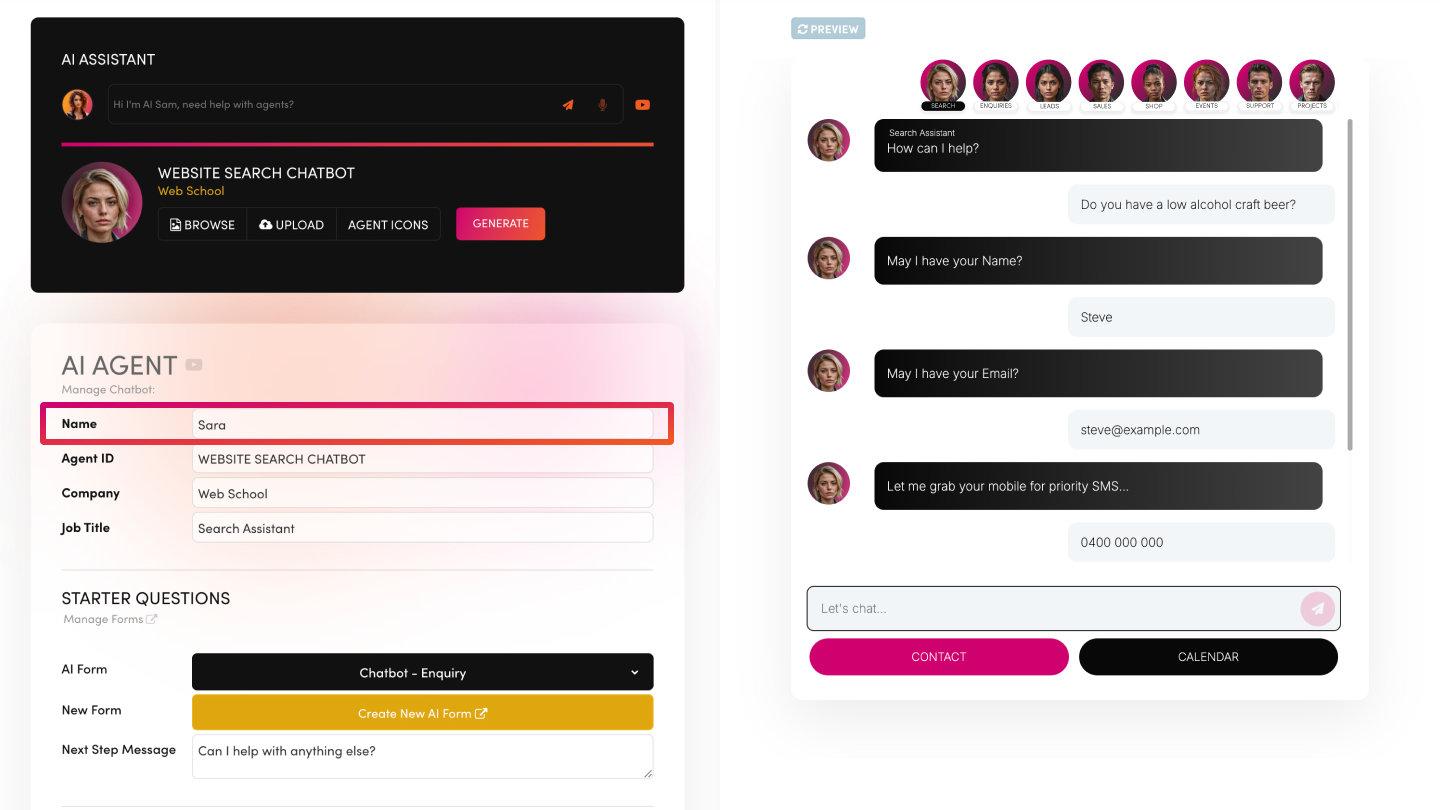
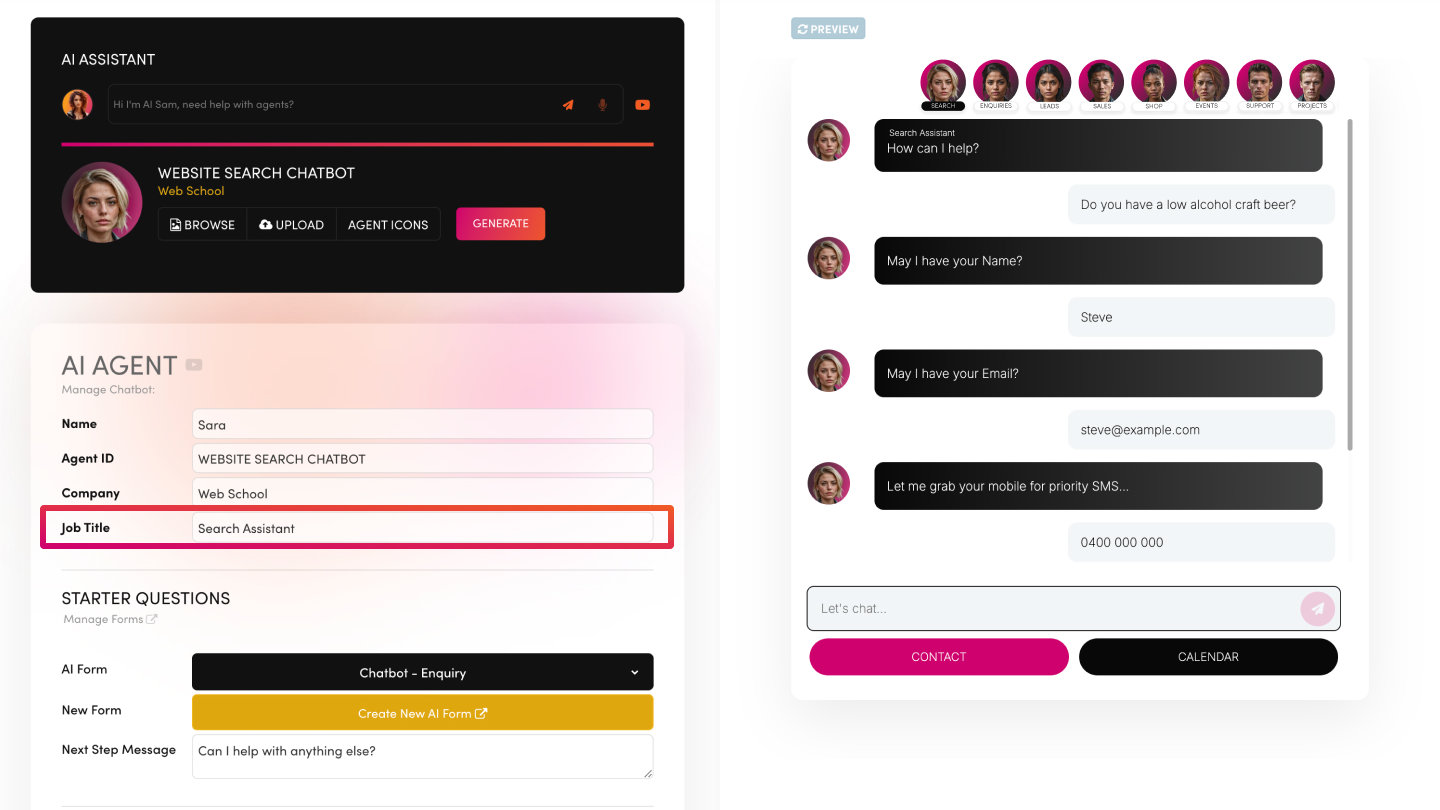
AI Agent
Select which agent you’re deploying (e.g. RECEPTIONIST CHATBOT v1.0 – Sam). The embed code updates instantly when you change the agent.
Width (Min / Mid / Max)
Controls the drawer/panel width experience for your Chatbot UI (especially important for the slide-in drawer experience).
Iframe Height (Min / Mid / Max)
Controls the visible height of the Chatbot iframe/container depending on the embed style you’ve chosen.
Agent Swarm (On / Off)
- Off: Deploy one specialist agent.
- On: Deploy a swarm/team experience, where the UI can surface multiple agents that work together.
Input Placeholder (Auto-managed)
This placeholder is not editable in Deploy.
- It is managed in each AI Agent’s settings.
- If you’ve selected an AI Form, the label of the first AI Form question becomes the input placeholder.
Manage Theme Colours
This button links to your Website Theme Colours. By default, your Chatbot colours are generated automatically from your website theme—unless you override them below.
Override Theme Colours (Deploy Swatches)
Use these swatches to customise the Chatbot UI in the Deploy preview:
- Background
- Customer
- Agent
- Accent
- Accent 2
You can also Reset to Light / Dark.
Embed Code
This code updates as you change settings. Copy it at any time using Copy Embed Code.
AI Analytics (Feedback)
In the AI Settings area you can also control:
- Feedback: On / Off
- Feedback Message: Input

CHATBOT EMBED TYPES
Born on MOBLE CMS, now embeddable on any website. Choose from embed types that match your page layout and user behaviour. Each embed begins with a simple prompt and can open the slide-in Chat Drawer for the full conversation—clean UI, zero clutter.
BLOCKS & LAYOUTS
Blocks (drop into any column)
- INPUT BLOCK (Block) — A minimal input you can place anywhere—great for blogs, help pages, footers, and sidebars.
- AGENT BLOCK (Block) — Agent on top, input below—perfect for product pages, pricing pages, demos, and feature highlights.
Layouts (full-width layouts)
- HERO BAR (Layout) — A thin full-width strip across your hero—great for headers, docs, and help centres.
- HERO BANNER (Layout) — Prominent hero with headline and media—ideal for launches, campaigns, and landing pages.
- HERO AGENT (Layout) — Large immersive hero with agent left and input right—great for demos and showcase moments.
Chat Experiences
- CHAT DOCK (Layout) — Embed the Chat Drawer onto a page to offer a ChatGPT-like prompting experience.
- CORNER POPUP (Launcher) — A familiar bottom-right popup opened by a launcher—lightweight, unobtrusive, and always available.
- CHAT DRAWER (Slide-In Drawer) — A slide-in conversation drawer that opens after the first input—keeps context and can link to other AI Chatbot team members.

TOP TIP
Before you go live, do a final device check. Test your Chatbot deployment across:
- Mobile, tablet, desktop
- Bottom-right popup vs embedded types
- Different page layouts (header, landing page hero, help centre pages)
This final review ensures a seamless responsive experience for every visitor.
HOW TO USE
- Choose your Agent: In AI Settings → Deploy, select your AI Agent (or enable Agent Swarm).
- Select your Embed Type: Pick the experience that suits the page (Block, Layout, Dock, Popup, Drawer).
- Set Width + Iframe Height: Use Min/Mid/Max presets to match your design and device behaviour.
- Confirm colours in Preview: Use Theme Colours by default, or override in Deploy swatches for a custom look.
- Copy and paste the Embed Code: Click Copy Embed Code and paste it into your page or CMS.
- MOBLE page blocks / layouts
- Any external CMS
- Any website header/footer area (depending on the embed type)
- Final test before launch: Test on mobile + desktop, and validate responsiveness on the pages you’ll deploy it.
BEST PRACTICES
- Match embed type to intent:
- Blog/help content → Input Block or Hero Bar
- Product/pricing → Agent Block or Hero Agent
- Support experience → Corner Popup or Chat Dock
- Keep design consistent:
- Use Theme Colours unless you have a strong reason to override.
- Don’t forget Webmind Run after content edits:
- If you edit Page/PDF Knowledge Base content, always run Webmind to update the model.
- Beta test on real pages:
- Test the Chatbot where users actually browse—homepage, pricing, product pages, help centre—and iterate fast.
BONUS TIP: EDIT KNOWLEDGE BASE CONTENT DIRECTLY (FAST FIXES)
Instead of rewriting whole pages or re-making PDFs, you can edit your JSON Knowledge Base content directly—super efficient when you need to remove obsolete info fast.
Edit PAGE content
- Go to Pages.
- Click Settings.
- Review the scraped content and update it.
- Press Save.
Edit FILE/PDF content
- Go to Files.
- Search and open the PDF/document.
- If needed, click Generate so text is extracted into your Knowledge Base.
- Edit the extracted text and press Save.
Important: After edits, go to Webmind and press Run to update the language model (as covered earlier in the course).
RELATED HELP


Play before you Pay?
GETTING AROUND
SUPPORT
AI SALES LINE
AI SUPPORT LINE
ENQUIRIES
team@moble.com.au
GET A QUOTE
A Web Builder for Design. A CMS for Business. We serve all businesses from SME's to Enterprise. Talk with us for AI development, custom website design, website development, ecommerce websites, directories, intranets and social networks.
PRIVACY | WEBSITE TERMS | PLATFORM TERMS | © 2026 MOBLE PTY LTD