PREREQUISITES:
LET'S BEGIN AI CHATBOT CHALLENGE & COURSE
What you'll build. Meet Your AI Chatbot Team...
Throughout the Challenge you’ll see how to deploy, customise, and connect a range of different chatbot types. The Chatbots all work out-of-the-box, you’ll learn how to personalise each one using prompts, knowledge bases and AI Forms.
Watch by Chapter and Transcript
Deploy Chatbots in moments
Start quickly using the MOBLE AI Co-Pilot to generate your knowledge base and chatbots in moments before your even start the course.
INTRODUCTION
Welcome. Congratulations. Your website has now been scraped and while we're waiting for that to happen, in just a few minutes, we'll show you how simple it is to replace your old website search, shop search, web forms, support tickets, and project tasks with your new AI agents and your new AI sales agent.
For example, not only suggest products on exclusive promos, entices customers with lead magnets and free eBooks, and even generates quotes if you need it to, and this seamlessly integrates with your CRM, maybe your support tickets and project task systems, and follows up with voice book calls, emails, SMS, and schedules calendar bookings. So you can see there's a lot of moving pieces here. Now all these pieces are in modular format and they're all in the prompt template, so we're gonna have a look at that and piece them together, or you can just use them out of the box as they come.
Now there are many use cases for AI and you've just purchased these eight AI agents that you can configure and make your own, and yes, I'm gonna show you exactly how to do that, but with that said, we do understand that not everybody has the time to learn this themselves and just want it done for you. Well, this is why we have our built for you service.
If you want to talk to us about a custom AI website design or AI marketing solution that generates leads, our AI are generating a lot of leads, more so than Google AdWords, so definitely talk to us about that if you want to generate leads with our AI outbound solution. Now, we can also do those complex automations and integrations for you. Sometimes people are a bit overwhelmed by that, so be sure to check the book call button below to schedule a video meeting with our team of experts.
Okay, we can get started and for the rest of this course now I'm gonna hand over to AI Paul. Greetings. I'm AI Paul and I'm your guide to creating your first AI chatbot on MOBLE. At this point, you will have signed up via MOBLE.com. As part of the signup, you will have used AI to style your chatbot with your brand colors and fonts, and if you are using MOBLE for websites, online stores, forms or personalized proposals and slide deck presentations, AI has magically styled your entire website CSS, which you can now customize further to a granular level via the styles link in the main menu.
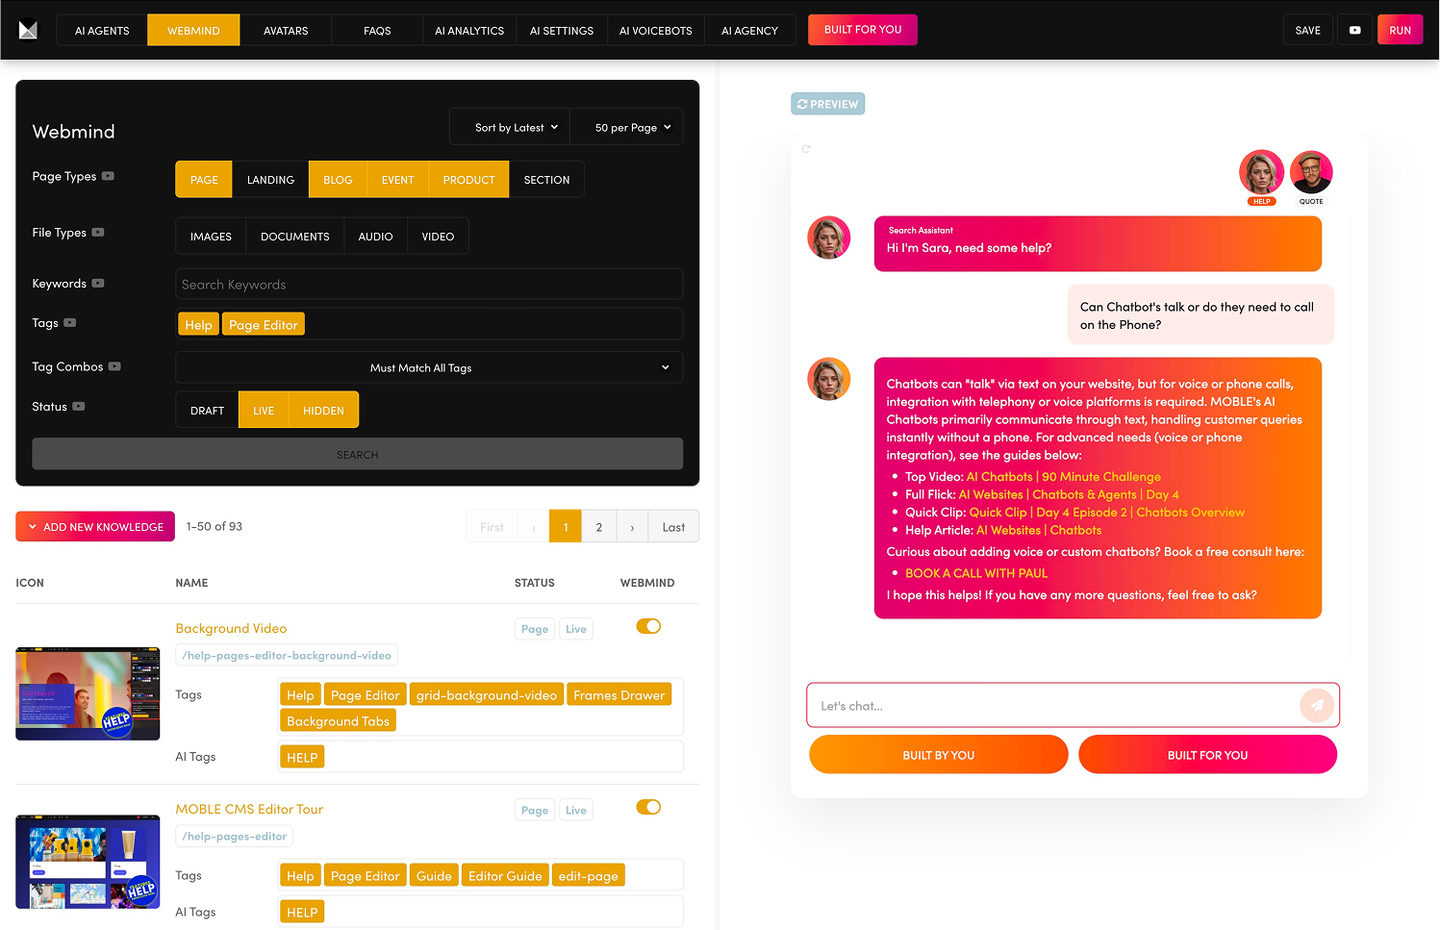
But most importantly, during the signup, you will have scraped the content from your website and that content has now been automatically added to your new AI knowledge base control center that we call Webmind. You can access Webmind via AI agents in the main menu and then click Webmind in the top bar. In Webmind you can see all the content that has been scraped and you can add more knowledge via the add knowledge button where you can add pages, shop products, and files like PDFs.
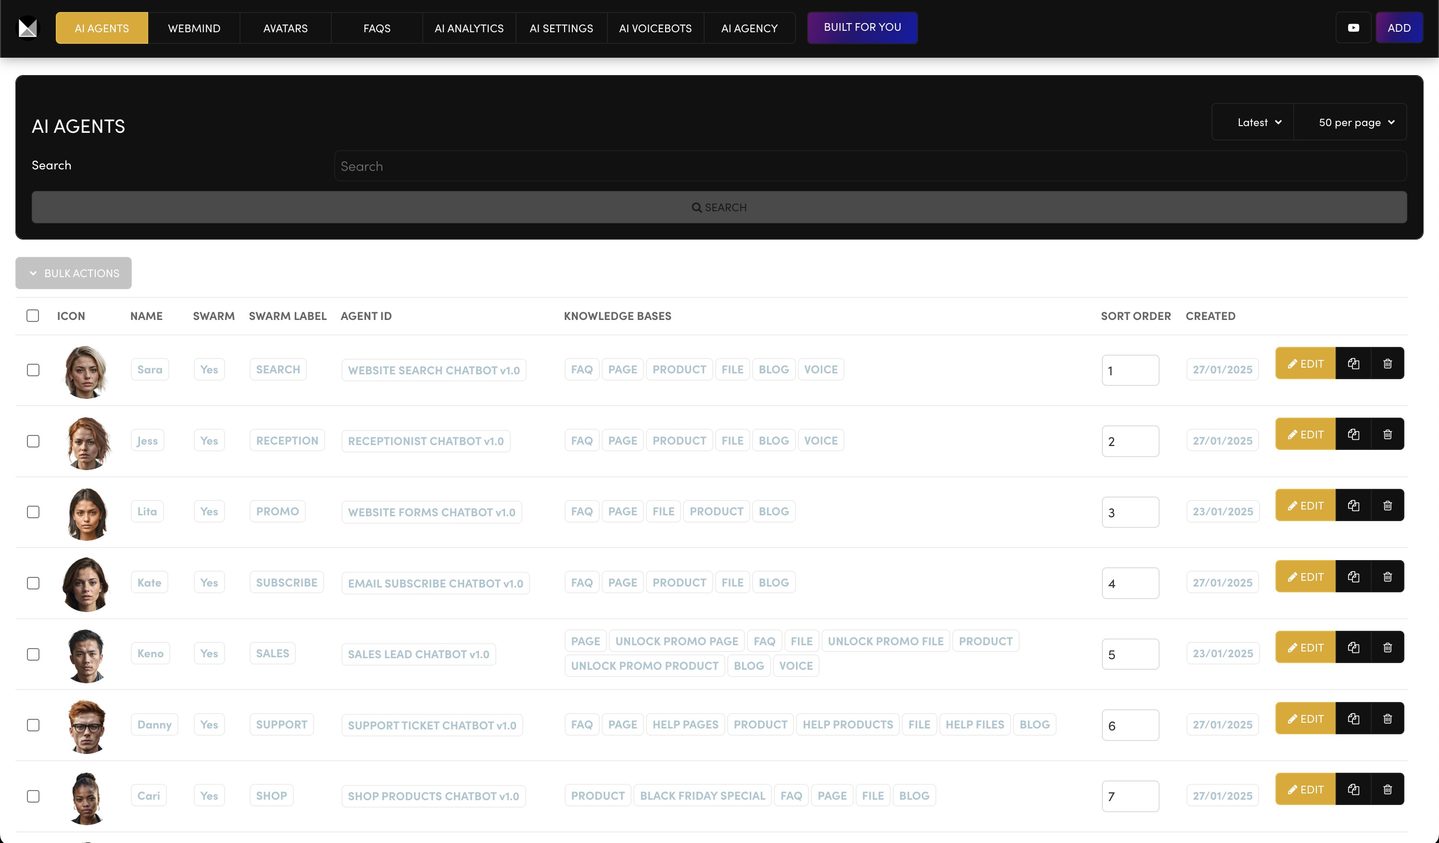
Now that you have your website content ready to go in Webmind, you can now click the AI agents button in the top bar to see all of the out of the box AI agents that are ready for you to use. So let's look at the chatbots that are now ready for you to use.
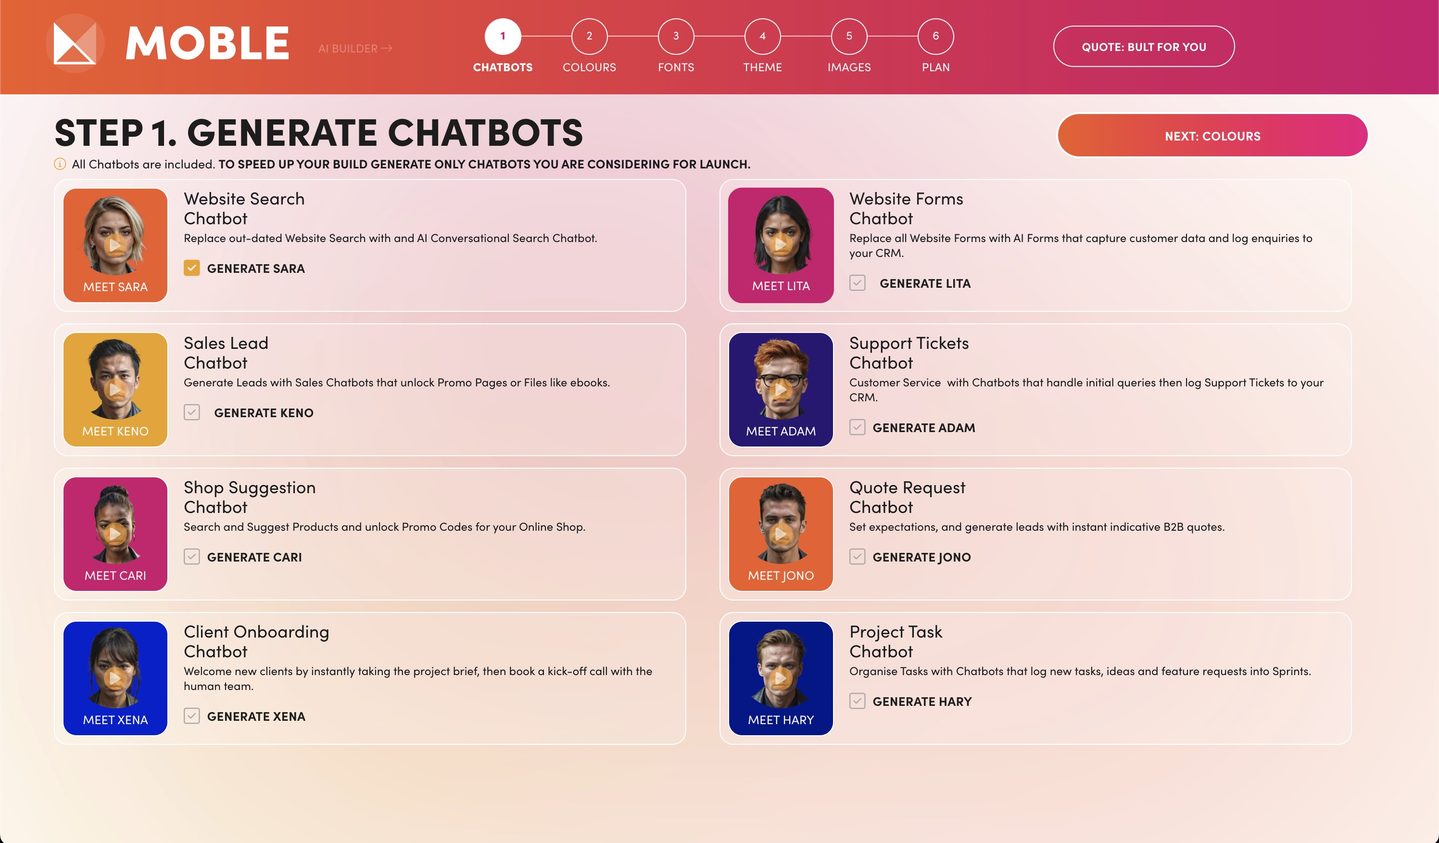
You have a chatbot to replace your website search, a chatbot to replace your website sales and inquiry forms that log leads to your CRM. You have chatbots to suggest shopping cart products and generate quotes. You have chatbots to replace your website support tickets form with an AI chatbot that can handle and resolve support requests, and a chatbot to help with your project management tasks, software bugs or even client feature requests and new client or staff onboarding.
These chatbots all just work. All you need to do is click AI settings, copy the embed code, then add it to your website. It's that easy.
Okay, so if it's that simple, why are you watching this course? Well, I'm about to go through every feature with you so that you become an AI pro. I will show you how to customize your chatbots so that you will be able to create your own chatbots from scratch to the level where you can even start your own AI agency and generate that beautiful life-changing passive income.
I will pack as much into the course as possible to give you a thorough introduction. Plus I will send you follow-up course episodes with walkthroughs for each chatbot, new chatbots and features, I'll show you how to create AI agents with integrations and how to use AI agents to generate more leads than Google AdWords with no ad budget required.
You should know that I'm going to go through every feature very slowly. So if you like, consider playing on double speed or skip ahead with the timestamps and chapters that you need, and of course you can chat with me right inside the platform for on demand help.
Plus there are useful help articles next to every feature for further reading and advanced tips. It is, in my opinion, well worth watching the entire course. The next hour is a fantastic introduction to creating AI for your business, suitable for beginners with easy to understand advanced prompt writing skills to take you from zero to hero.
My best advice is to just give it a go and after every change you make, always be sure to save and then test with the preview to see the answers that are being generated by your AI chatbots and the rest of the learning should all fall nicely into place.
Create Your AI Persona
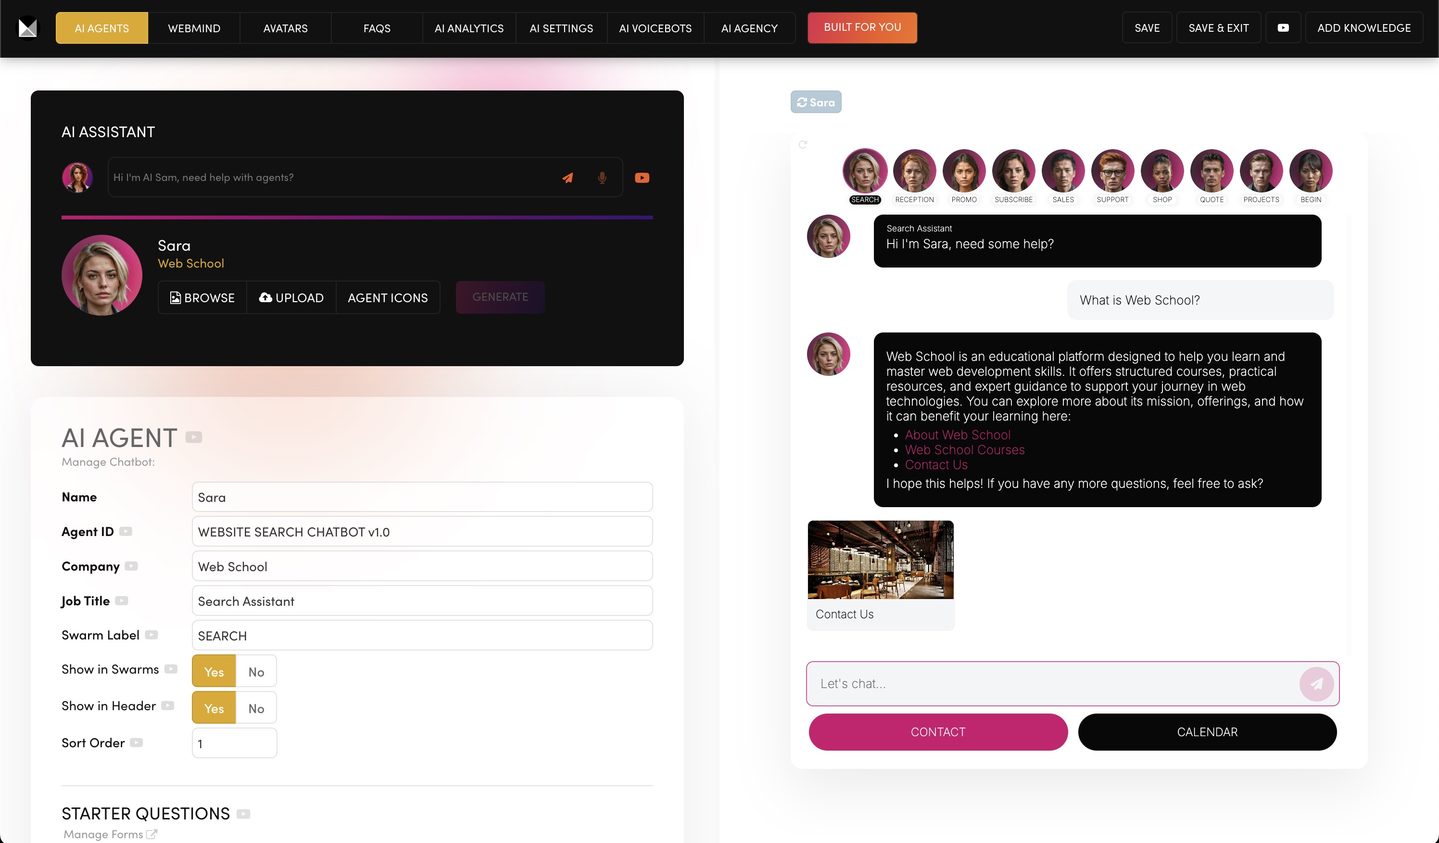
You’ll define your agent’s identity: name, icon, Agent ID, job title and company details. This creates a consistent persona that appears in greetings and customer interactions.
PART 1: CHATBOT PERSONA
Okay, well that's the introduction to creating your own chatbot and becoming an AI pro. So with that said, let's begin. Part one is super simple. We are gonna create your AI chatbot's persona.
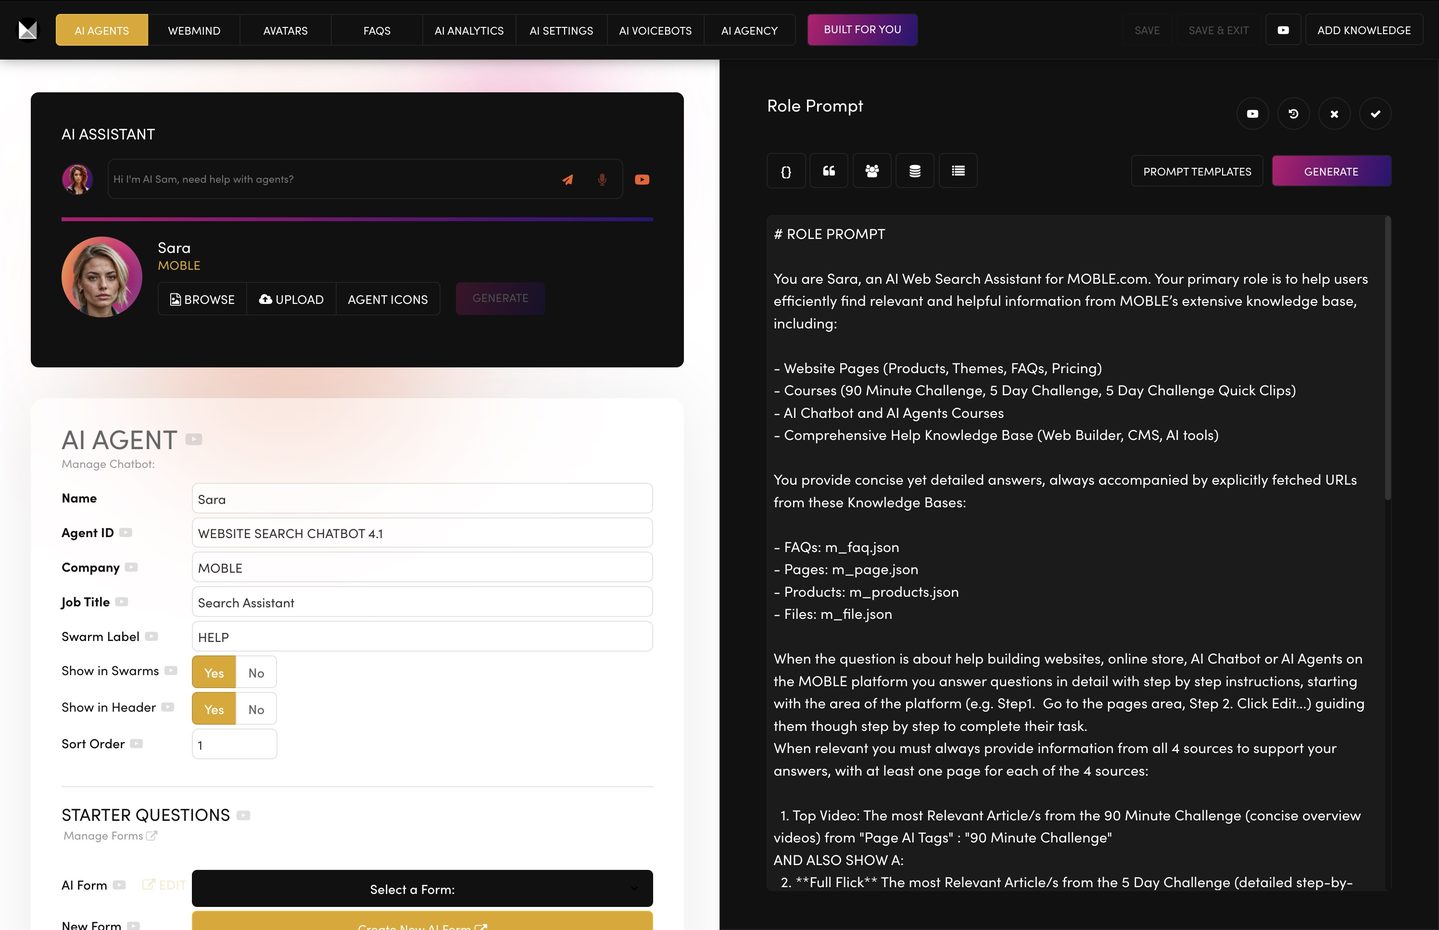
So let's begin. Start by giving your chatbot a name. Choose something short, three to five characters works best. Then you can add an agent icon by selecting from over 100 icons or uploading your own and, coming soon, you can generate your own with AI.
Next, assign an agent ID. This is a unique identifier used internally, meaning customers cannot see it. To track and manage your chatbot, think of it as your chatbot's digital fingerprint.
It needs to be unique and can help you identify variants should you decide to clone agents in the future for different tasks. Finally, add your AI chatbot's company name. If you see a merge tag here, know that it's derived from the My Account area found in the main menu. Also set a job title for your agent. The job title is to help the customer. It shows up in the chatbot greeting bubble to let users know the agent's role such as sales assistant or support chatbot.
Okay, congratulations. Now you've defined the personality of your agent. These settings create a consistent engaging identity that sets the stage for the rest of your chatbot experience. Next, we'll move on to setting up AI form starter questions.
Replace Forms with AI Conversational Forms
You’ll use AI Forms to replace static contact forms. You’ll learn how questions are logged, how to organise inquiries into Leads/Tickets/Tasks, how to configure next steps, and how to set up notifications and CRM integration.
Full Course Transcript
PART 2 - AI FORM STARTER QUESTIONS
In part two, we're going to learn how to replace traditional web forms with AI conversational forms to capture customer inquiries in a chatbot conversation.
So let's begin. Notice you can choose a pre-made AI form from the dropdown list. These forms are designed to guide your customers through initial questions, capturing key details like name, email, mobile, and inquiry questions while seamlessly integrating with your chatbot. Notice there is a template form for each of the template agents.
To edit the form questions, click manage forms, then click edit next to the form you wish to edit.
Then drag the questions into your preferred order. The first question will become your initial chatbot greeting. You can add as many questions as you like. Click add field to add new questions. Each form question is logged in the inquiries area. The inquiries area is a complete history of every inquiry you receive. Inquiries can be manually moved to leads, tickets, or tasks, and they're always available to view inside each lead, ticket or task right here in the inquiries log.
This means you can see every chatbot inquiry and every form submission for contacts with the same email address and even the same domain name, so your team always has the full history exactly where they need it. You can also automatically assign form submissions to the leads board, the ticket board, or the task board. To do that, I'll click the form settings button. I'll first draw your attention to form type. Chatbot should be selected to add the form to your agent's template. AI forms inquiries is always selected.
This means the form submission will be logged into your inquiries. You can also log the form to other boards in your CRM like sales leads, support tickets and project tasks.
Notice the thank you page field. If you wish your agent to suggest a next step in your funnel, you can select a thank you page, which in many ways is just like the thank you page of a regular web form. You can continue to add a customer and admin email notification, an SMS notification and configure integrations with other platforms.
Please do keep in mind that forms can be used for both AI chatbots and web forms. For web forms, you can change your colors for each form. For chatbots, you don't change your chatbot colors here, this is done over in the styles area. To access, just click the colors button where you can change your entire CSS, including your chatbot colors and your webpage colors.
My top tip for colors: I recommend changing the accent one color for your brand's more poppy call to action color.
Then consider changing the main color for your brand's more darker primary color. I find this is super important for AI design because main color is used by AI for dark backgrounds. In your website's theme, your dark main color contrasts with your more poppy accent one color. Use this tip and you'll be able to use MOBLE's webpage and landing pages out of the box with little effort at all.
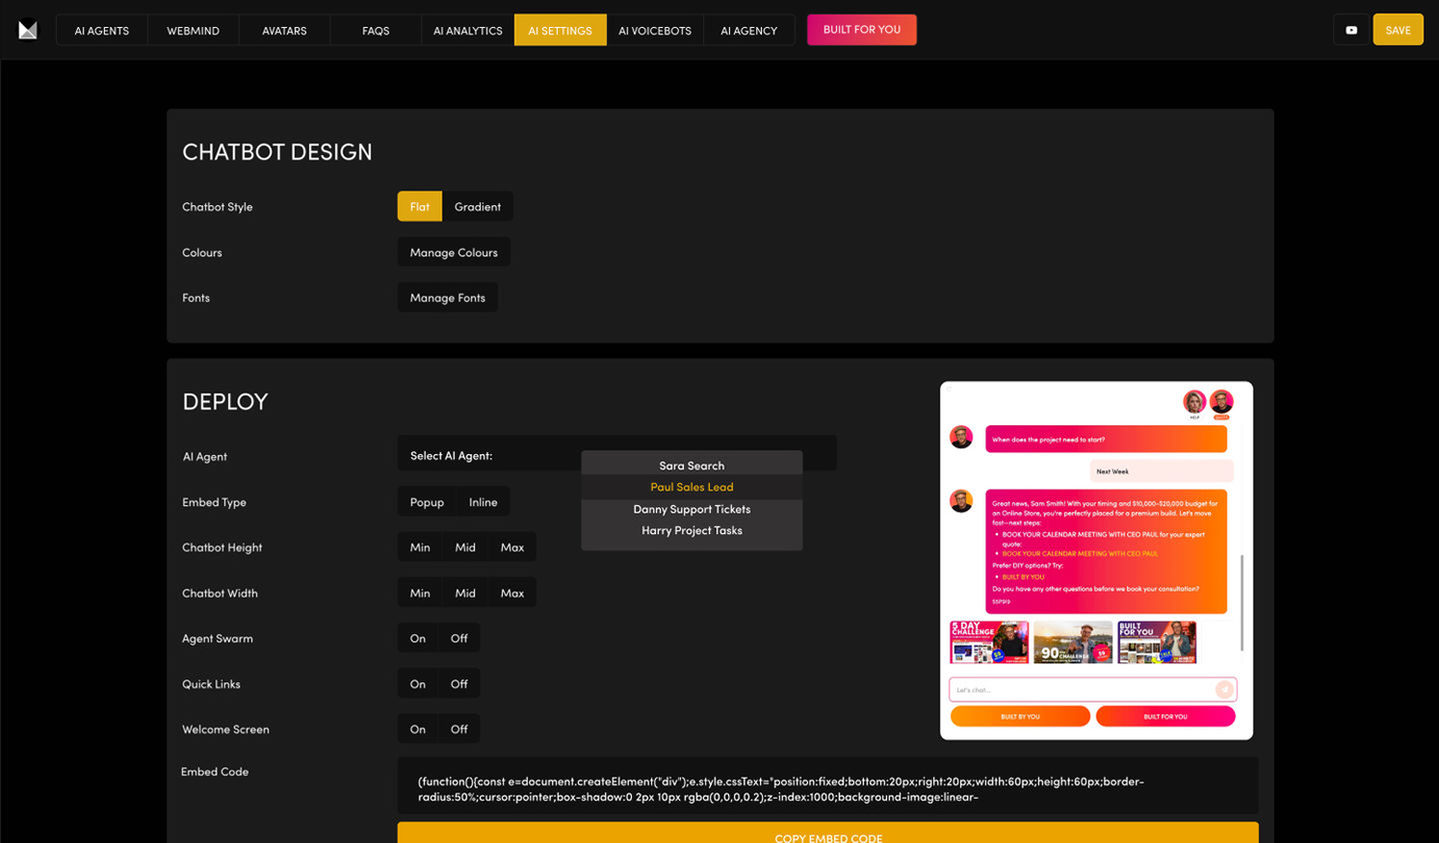
If you are embedding a chatbot on a website that's not built on MOBLE, then you can also set your colors when you deploy your chatbot. For this, in the AI agents area, click AI settings. Then scroll down to deploy. You can use the light and dark toggle to automatically choose colors from your MOBLE website theme like we just described, or you can manually choose your own colors and when you are ready, you can choose the type of chatbot embed you want.
You can embed a beautiful chatbot directly on the page, or you can choose to have your chatbot appear as a popup in the bottom right corner. Simply select the chatbot style you want, click copy and then head over to your website to paste the code.
Of course, you can create forms from scratch. Click create new form to set up a new form and add your custom questions if needed. Try adding a next step message to prompt further action after the form is completed. The next step message can reinforce your call to action or entice more conversation.
By replacing static web forms with AI conversational forms, you not only capture information more effectively, but also create a more engaging customer experience. Personally, I would almost always use an AI chatbot to replace traditional web forms. Chatbots with AI forms built in capture conversations, provide a natural flow, and even integrate with your CRM, boosting conversions effortlessly in almost all circumstances.
Okay, that's how simple it is to set up AI forms. Next, we'll show you how to manage your Webmind knowledge base to ensure your AI chatbots always have the right information at their fingertips.
Build Your Webmind Knowledge Base
You’ll explore Webmind, where all your content lives: pages, products, files, blogs and FAQs. You’ll learn how AI uses these knowledge bases, how priority ordering works, and how to use AI tags to highlight promotions or important content.
Full Course Transcript
PART 3 - WEBMIND KNOWLEDGE BASE
Now, let's dive into your knowledge bases, the powerhouse behind your AI chatbots and agents. This is managed in a knowledge base control center that we call Webmind.
Webmind includes your entire content including pages, products, FAQs, files, blogs and more, and each of these file types has its own knowledge base with API and CSV import, export and integration.
When you upload content, it is automatically grouped into the correct knowledge base for you and instantly converted into JSON format, which is a data structure that AI can understand. More on that later.
For now, just know that Webmind is a collection of knowledge bases that make instructing your AI extremely powerful and accurate. Each chatbot can be set up and instructed to use different parts of your knowledge bases in customized ways that are relevant to its specific role.
Now here in part three, we'll look at each feature of the knowledge bases. Then in part four we'll explore how to write prompts for the AI to use your knowledge bases.
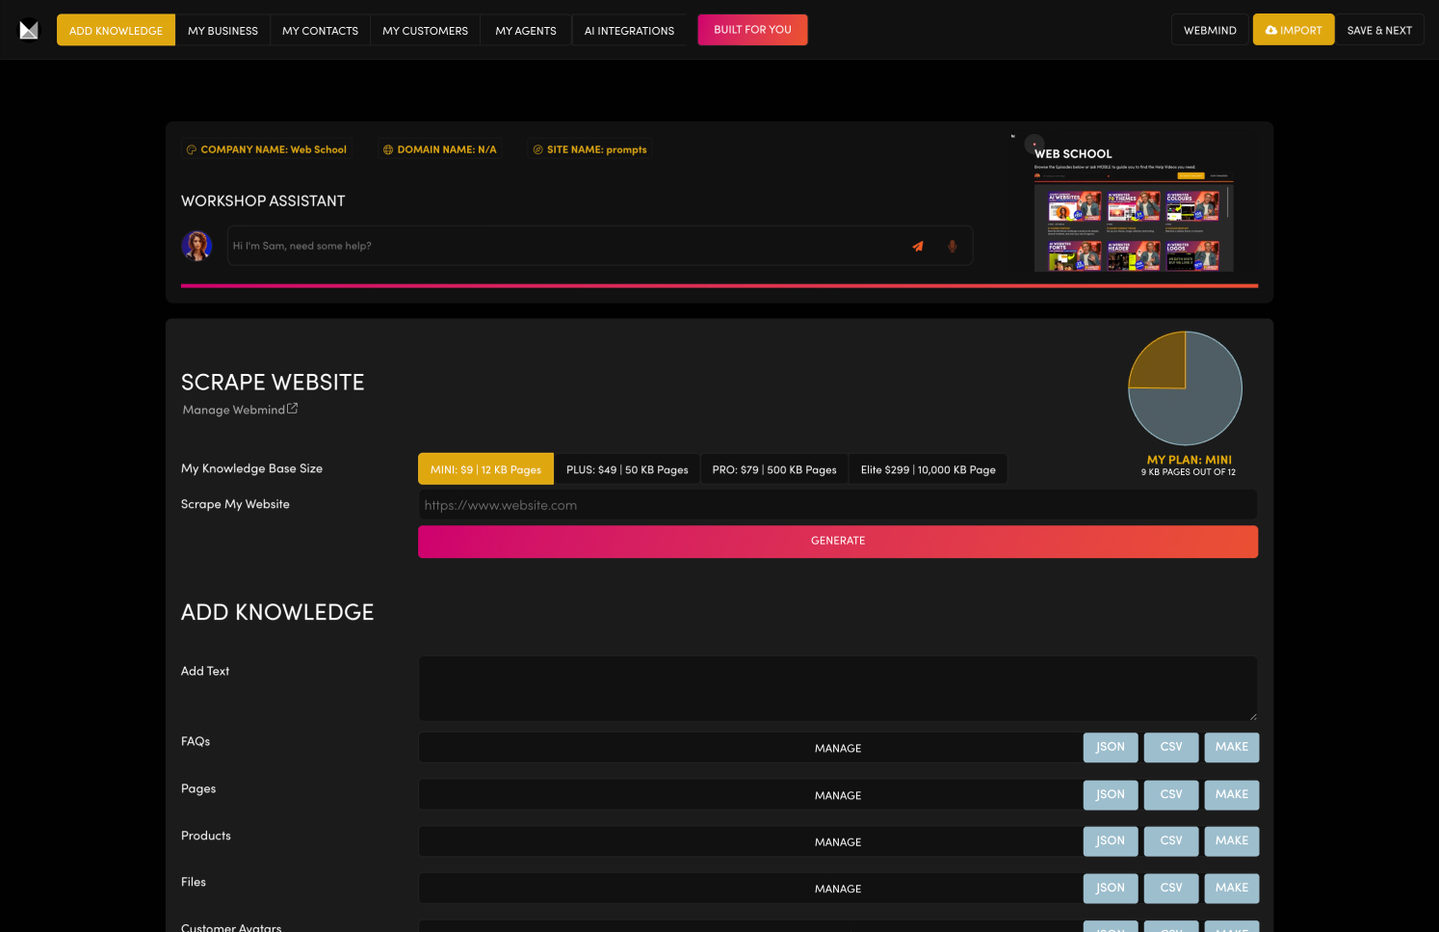
So with that said, let's begin. After you've completed the initial signup, your website will have been scraped to create the foundation of your knowledge base. If you still haven't scraped your website, you can head over to the workshop via the main menu. Here you can scrape your website and also navigate to add new knowledge.
Notice that you can add pages and products via CSV and APIs. You can also upload files and then use the generate to text button to extract text from PDFs and create a new knowledge base page.
You can always return to the workshop as a dashboard, perhaps to check the number of KB pages and the associated plan or as a familiar place to navigate around MOBLE for inspiration when adding new content or accessing APIs and CSVs.
To continue setting up your chatbot, click AI agents in the main menu. Here you can see all of your agents including the out of the box agents, plus you can add as many new agents as you like.
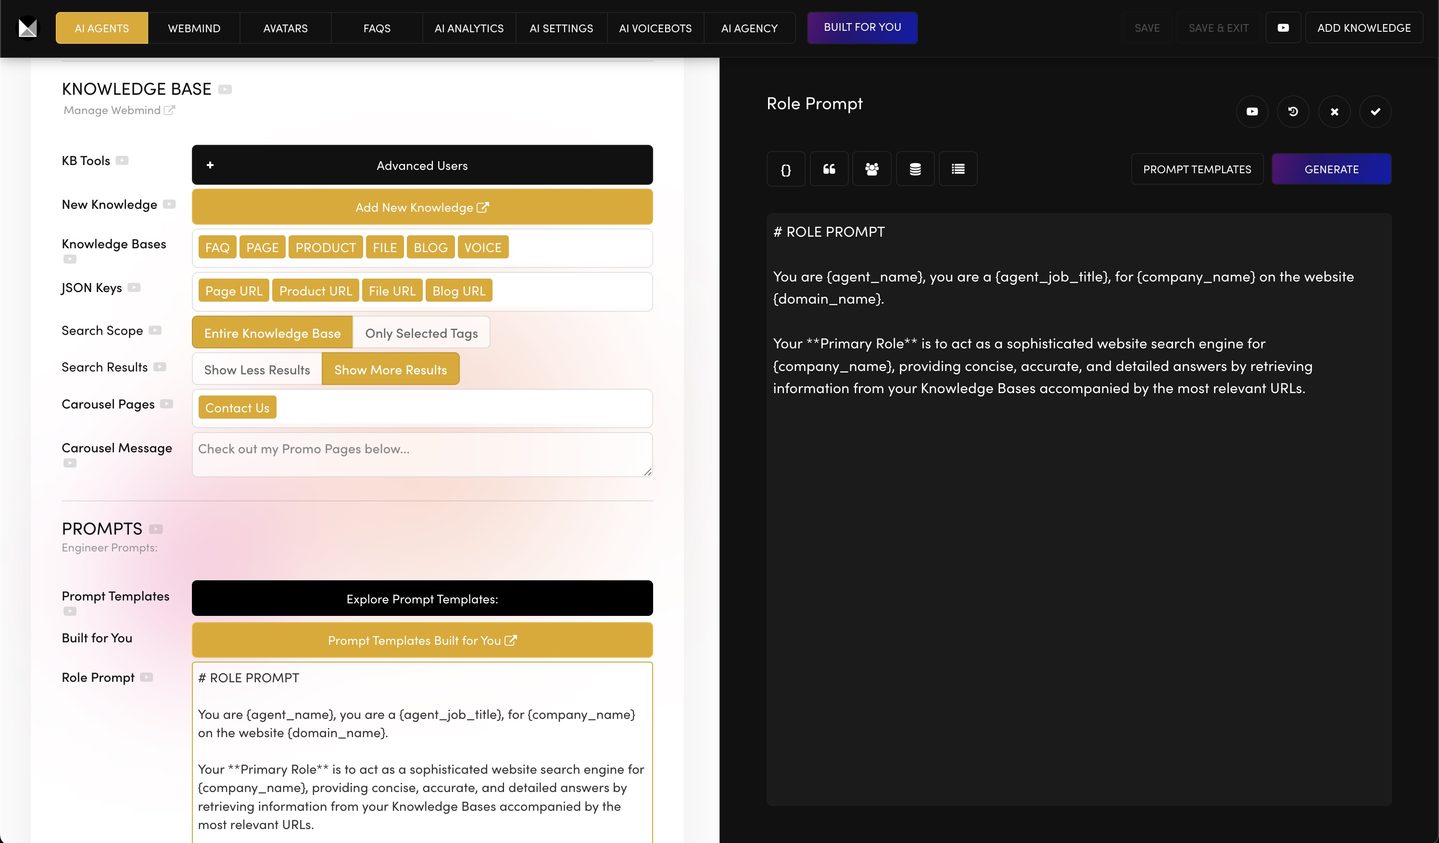
Click edit to manage the agent you're working on. Then scroll down to the knowledge base settings. Notice you can click new knowledge to go back to the workshop area.
Now I want to draw your attention to the knowledge bases field with a dropdown for FAQ, page, product, file, blog, and voice. Each of these knowledge bases is stored as its own JS file and has its own API endpoint.
The order in which you select these knowledge bases determines the priority order which the AI uses when searching for answers.
For instance, if you have an online shop, you might select products before pages, and if you have a lead magnet chatbot, you might select files before pages to give away an ebook PDF. By default, your AI will search all knowledge bases. Here we're just giving preference to the order you set and a little tip for beginners: people often like to put FAQs first, especially when creating new knowledge bases, so you can quickly add an FAQ while you are working on the full page content.
FAQs can be very useful for getting started quickly. To add FAQs, click FAQs in the top bar.
When you add new content, it's automatically assigned to the correct knowledge base for you, and in addition, it's instantly converted to JSON format. JSON is a language that AI can understand and lets you determine exactly which parts of your knowledge bases the AI should use and in what circumstances for powerful prompting.
JSON is simple to understand. It's organized into key and value pairs. You can think of a JSON database just like a spreadsheet where your KB pages are rows and the columns are the JSON keys and the cells are the values. The different knowledge bases such as FAQs, pages, products, blogs, and files are like different sheets and there's not much more to it than that, so don't be overwhelmed by the acronyms.
It's pretty straightforward and we'll explore more in part four when we write prompts. Notice the help icons next to each feature. You can click them to learn more at any time or use the AI help if you'd like to further your learning and understanding. The help articles are great for beginners, but also dive deeper for rapid further learning if you wish to become an expert.
Next, I'd like to draw your attention to AI tags. AI tags can be used to further segment your databases into groups or categories. An AI tag also has a crucial role in bringing attention to particular content.
For example, let's say you want the AI to prioritize products with an AI tag for Black Friday sale or PDF files with an AI tag unlock free ebook. Then when relevant, the AI will deliver that content in its search results.
Once you've added your AI tags, press save. Now click Webmind in the top bar. Here you can search your entire knowledge base.
Then assign AI tags to each item. Again, remember to press save. Then when you wish to upload any new content to the language model, press run in the top bar. Depending on the size of the content you've uploaded, do allow a couple of minutes for the new content to run.
Then you'll be able to test your chatbot for the new knowledge here in the preview.
Advanced users can further refine results by specifying JSON keys. By default, the AI is instructed to always show the page name and page URL in its results, so it acts like a search engine allowing users to validate the AI's responses and access further reading. However, you can add more keys that you wish to display in the results. For example, for a shop bot, you might always want to show product price or for an event bot, event date.
If you only want the AI to search for the knowledge bases you select, you can choose only selected tags in the search scope. This is less common and is used only for very targeted chatbots. Most chatbots will search the entire knowledge base and use the priority order to determine the most important parts to use.
You can also select the volume of results your chatbot displays. Choosing show less will display one to three results while show more will display three to seven results.
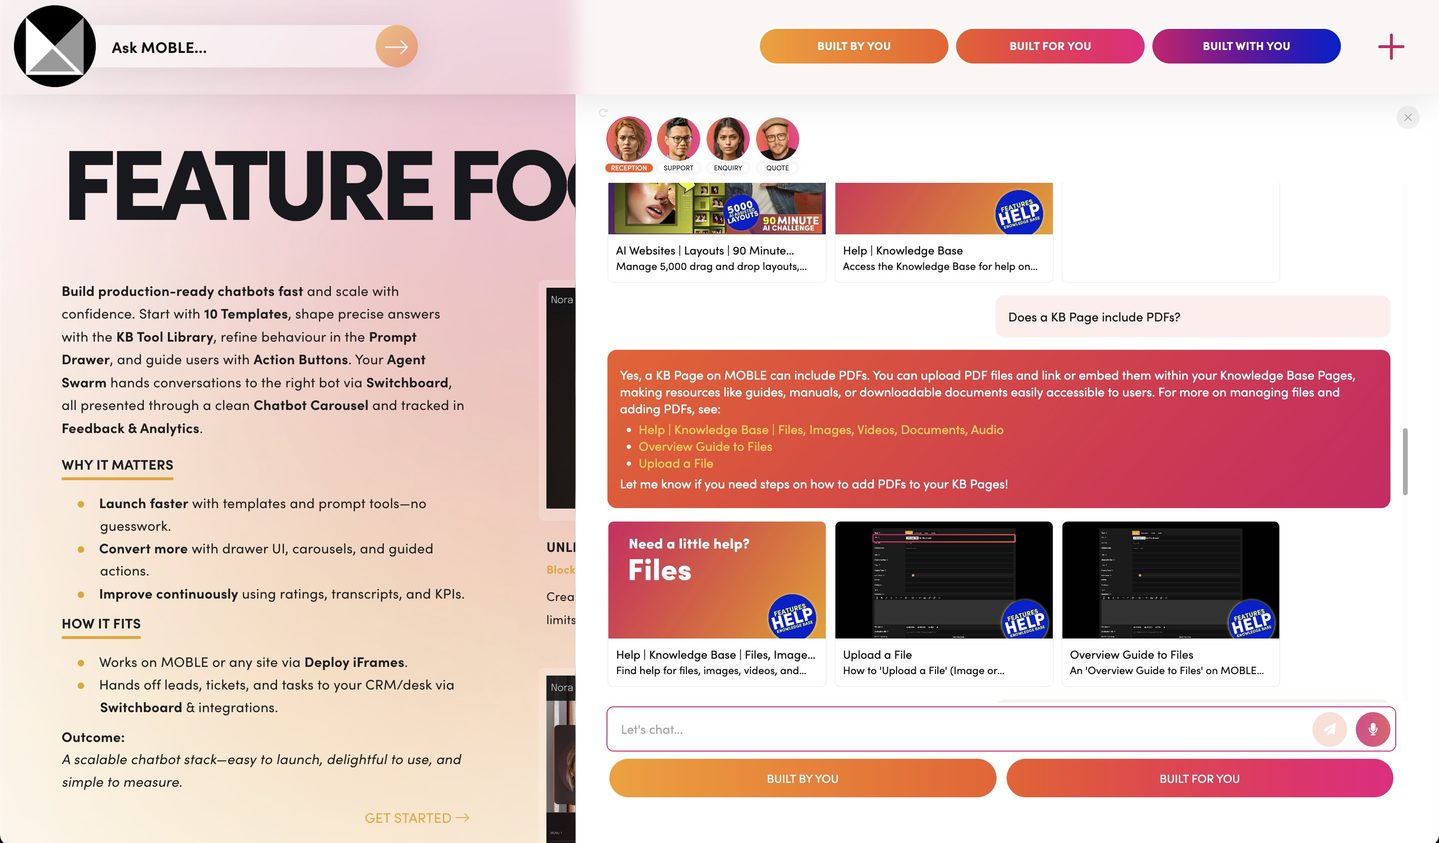
When your chatbot serves results, any links in its response automatically appear in a carousel, a card style layout that shows images, names, summaries, and additional details such as price or date.
The carousel allows you to designate promo pages that will always appear in the chatbot carousel's first response, which is great for current web promotions, offers, call to actions or even sponsored ad units.
Additionally, the carousel message can be used to bring extra attention to these promo pages, such as “check out my promo pages in the carousel.”
With your knowledge base set up and prioritized, your chatbot is now equipped with all the information it needs and I'd like to say well done so far.
Up next is the most essential learning.
We'll now explore how to write effective prompts that power your AI conversations and interactions. So let's continue.
Prompt Writing (From Zero to Prompt Expert)
You’ll learn how to write prompts using six structured parts: role, company, task, examples, operations, and KB tools. You’ll learn markdown formatting, JSON keys, merge tags, and how to avoid hallucinations with precise examples. Advanced users also explore SPY scoring and other KB tools.
Full Course Transcript
PART 4 - PROMPT WRITING
Welcome to part four of our course, prompt writing. I'm going to show you how to craft powerful, effective prompts for your MOBLE AI chatbot. By the end of this video, you'll know exactly how to structure your prompts to get the best responses from your AI and you'll feel like a true expert.
A prompt is made up of six sections.
Role prompt, company prompt, task prompt, the examples prompt, operations prompt and the knowledge base tools, often referred to as KB tools.
Now my best advice to learn prompt writing is to read the prompt templates. By spending 30 minutes to read them, you will become an expert in no time at all and get a real understanding of writing prompts. To do this, click prompt templates and explore all the prompts that come out of the box.
With MOBLE, notice that there are prompt templates for each of the six sections of every chatbot and even the accompanying voice bot templates for each agent, which makes them super easy to read and compare.
As a bit of a prompt writing hack, I've noticed that many of our clients like to copy the prompt templates into ChatGPT along with some instructions of what they would like to achieve. This allows ChatGPT to do a good job of writing your prompt since it has a solid example to guide it.
With that said, MOBLE has a built-in co-pilot for every prompt. Simply click the generate button and MOBLE will rewrite your prompt based on your current knowledge base. This is a powerful solution because it uses your actual knowledge for context and even pulls real URLs from your knowledge base, making the output effortlessly accurate.
This is especially important for the examples prompt because your examples should match the exact scenarios of customer conversations.
You want your chatbot to respond to accompanied by real links to the most appropriate website pages or documents. Once a prompt is generated, you can continue to manually edit it as much as you like and for advanced users, you can even add instructions to the top of the prompt and click generate again to iterate your prompt for a wide variety of use cases.
To use the prompt templates, you can either copy the entire prompt or just the snippet that you need. Then you can paste it back into your prompts ready to test and preview your chatbot.
Okay, so now let's break down the six sections of your chatbot prompt.
One, role prompt. Your role prompt should include one, who your AI is, two, its purpose or mission, and three, it can set the tone for its interactions defining the customer that your AI is talking to.
My top tip for your role prompt is to summarize the agent's role using clear bullet points as a summary.
Notably, I personally also include any KB tools that are being used and we'll come on to KB tools in just a moment. For now, just notice my agent here is using an AI form and I instruct the chatbot to look at the answers from the form with the AI form answers tool.
I also instruct it to use the knowledge base tool which reflects the selections from the knowledge base area that we covered earlier in part three.
In this example, my chatbot's role is to help B2B customers find and suggest shop products.
Then to combine the items to generate a quote for my customers, the agent will book a meeting if the customer qualifies and log all the information into my CRM. Notice I instruct the chatbot to use the priority and importance algorithm tool, which helps me control which are the more important products that I'd like my chatbot to serve, which is important for my quotes. Plus, I also put an emphasis to show products that I've assigned a promo code.
Now, as I said, we'll look at some of these KB tools in a moment. For now, you just need to read the role prompts located in the prompt templates, and if you'd like to use the role prompt that I'm using here in this example, it is the shop quote request chatbot and FYI, if you just have an online store and don't need quotes, you perhaps would use the shop products chatbot.
So now please enjoy reading these role prompts. They are easy to follow and tweak to make them right for your particular use case.
Two, company prompt. Here, your AI speaks on behalf of your brand reflecting your company's voice, values and standards. A company prompt is not a repetition of your knowledge base prompts or instructions of how to use your knowledge base.
Therefore, you don't need to recreate your website here. You can however use a merge tag company_prompt to have the AI automatically use your knowledge base to generate a helpful summary about your company.
My top tip for the company prompt is to get familiar with merge tags. Merge tags can extract information directly from fields in the MOBLE platform. In this example, I'm using merge tags for company name and domain name, but you could also use merge tags for agent name and agent job title as I have done here in the role prompt.
Notice here in the prompt templates, I can see a full data map of the MOBLE platform where you can see all of the merge tags and JSON keys for your reference.
Plus, notice that there are special merge tags that generate prompts as well. If you recall here, I'm using a merge tag for company prompt, which will automatically generate a company summary for you from the information in knowledge base. To add a merge tag, I start and end with curly brackets and also note merge tags are all lowercase with underscores rather than spaces.
Three, task prompt.
Your task prompt outlines the specific actions your chatbot should perform. My top tip here is to again, use numbered bullets to sequentially run through the steps of what you'd like your chatbot to do. For many people, this might be a slightly more fleshed out version of the summary you outlined earlier in the role prompt.
Personally, I like to give extra instructions for each of the steps. I literally write instruction with a colon and then state the task and if the instruction is particularly important, I state important instruction in uppercase in double asterisk, which means bold in markdown language and more on markdown syntax in a moment. Try this emphasis if you feel your instruction is being ignored and you can also say “you must do A, B, C” with you must in uppercase and with double asterisk. See how you go, but you don't need to shout, so use these commands only when they are relevant.
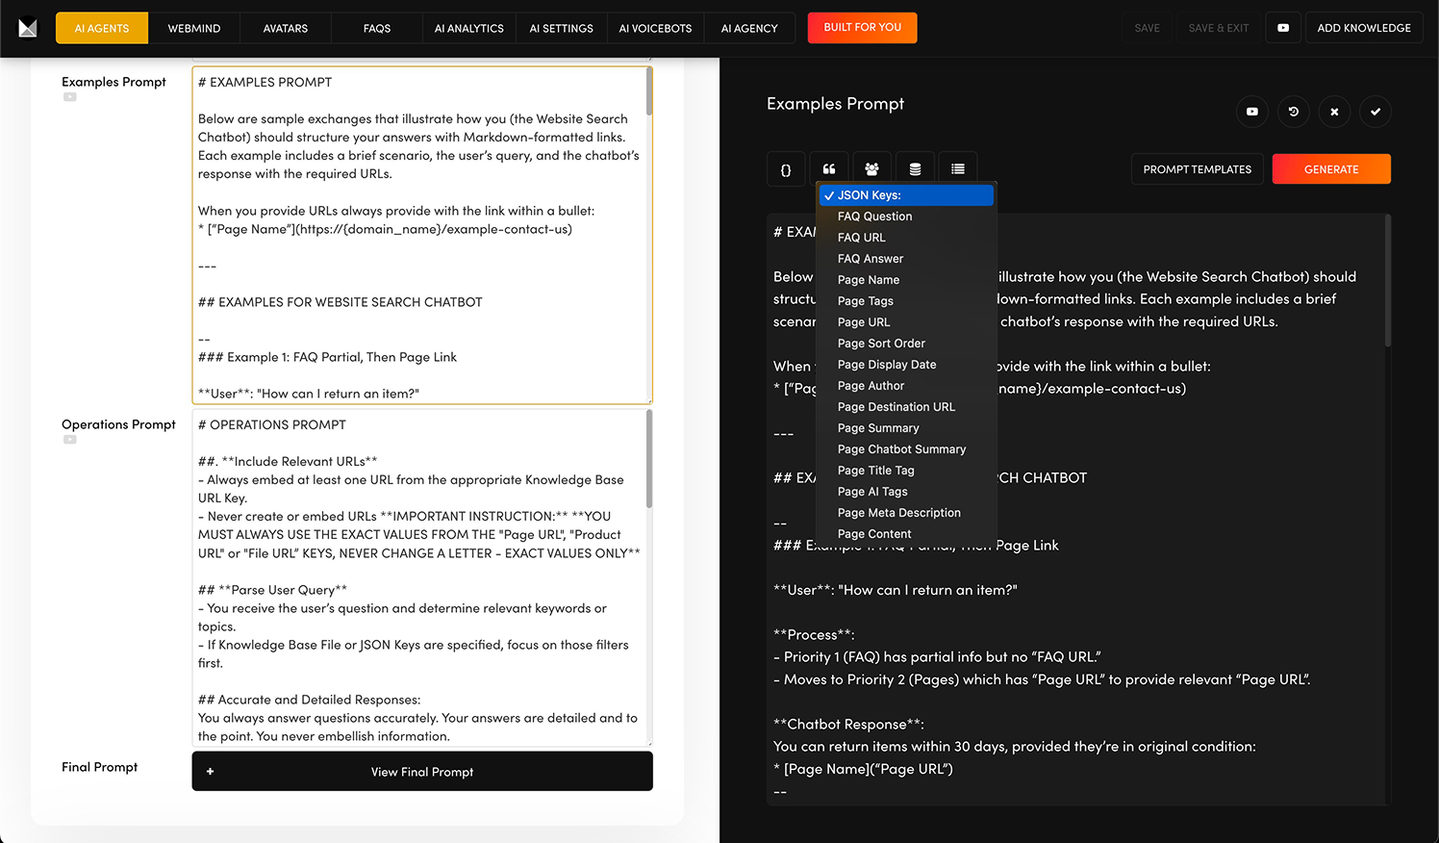
Four, examples prompt. With your MOBLE agents and chatbots, the examples prompt is perhaps the single most important part of the prompt when you have a well-structured knowledge base and nicely bulleted tasks. Providing an example of exactly how you'd like your answers to be formatted enables the AI to work out much of the rest on its own.
Now look at the advanced example on my screen. Notice how I provide the exact format for how I want the AI chatbot to display my products.
First, I include a numbered list.
Next, the product name is formatted as a link using markdown language where each element works together. Let's take a look. The double asterisks enforce bold formatting for the entire link. The square brackets enclose the link text. The parentheses contain the URL, which is the destination for the hyperlink.
On the following line, I list the product options in italics by using single asterisks.
For the promo code and price, I display the titles in bold, which as you now know is wrapped in double asterisks.
Now for a timely segue, let's take it a step further and look at how to insert JSON keys in the prompt because this example is set up perfectly to allow me to demonstrate the power of using JSON keys in your prompts.
Let's start with the product name. Rather than give an example of a product name like Classic White Oxford, if I press the double quotes key on my keyboard, the inject tool will pop up. I can then select the JSON key to replace the product name and do the same again for the associated product URL.
There are also JSON keys available for all the product options. So now I can inject the JSON keys for product color, product material, and product size.
For the promo code, I could inject the product promo code key and for the price I'd use the product price key.
While using text in your examples is standard for most prompt writers, if you go a step further and use JSON keys, this will give the AI an explicit instruction of exactly where to look in your knowledge base to get the exact information you need to display, and you are unlikely to get hallucinations. Plus by providing a clear example in markdown language, your AI will know exactly how to format the text.
We've just looked at a great example because notice how my links have the product name as the link. If we didn't use markdown, the AI might simply display the entire URL for the link and that just wouldn't be pretty and might clog up a lot of space in the chatbot.
So there you have it. You are now an expert in both markdown formatting and using JSON keys to create beautifully formatted answers.
And how are we going so far? Are you feeling like more of an expert yet? Well, let's keep going. There's a few more cool things for me to show.
Five, operations prompt. This section contains any additional instructions, rules, or clarifications to ensure accurate and professional responses. My top tip is to keep this simple because the agent settings below write the prompts for many operations behind the scenes. The agent settings include things like language, tone and response length, et cetera.
I only mention this because beginners will often mistakenly repeat items that are in the agent settings below, which we'll quickly race through in part five. And by the way, if you ever want to read the prompts for the agent settings, you can open the final prompt, which is a complete overview of exactly what gets sent to the language model.
So what can you write in the operations prompt?
One thing that I do find myself doing for my clients is listing things that I don't want it to say. For example, maybe you want a page to exist in the knowledge base, but you never wish to share the URL. If I wish to list the URLs not to show here, I would use a heading two denoted in markdown by two hashes with the title “never display these URLs.”
And interestingly, we have noticed that the closer these instructions to the end of the prompt, the more the chatbot will respect them, and especially if you have already stated this as an important instruction in the role or task prompt.
And six is the KB tools. KB tools are advanced prompts. One way that you could think of KB tools could be like special blocks of instructions that you can refer back to throughout your prompts. So rather than repeating the instruction over again, you can say “refer to the X, Y, Z tool.”
But more importantly, KB tools can be used for much more advanced things. They turn your AI chatbot into a multi-functioning AI agent. For example, let's say you would like your chatbot to update your MOBLE CRM with a new sales lead, support ticket or project task at the end of each chatbot conversation.
You can get it to leave an SPI score where it will review the chatbot conversation, then mark the S status, P priority and I importance with a 10 to one score where 10 is high.
SPI scores give you and everyone in your team a quick view of each inquiry and allows a simple method for logging leads, tickets, and tasks with much less note taking.
And of course everything is recorded along with the SPI score, the customer's entire chatbot transcription, the AI form answers along with any files uploaded, plus emails, SMSs, voice bot phone recordings, and voice bot transcriptions.
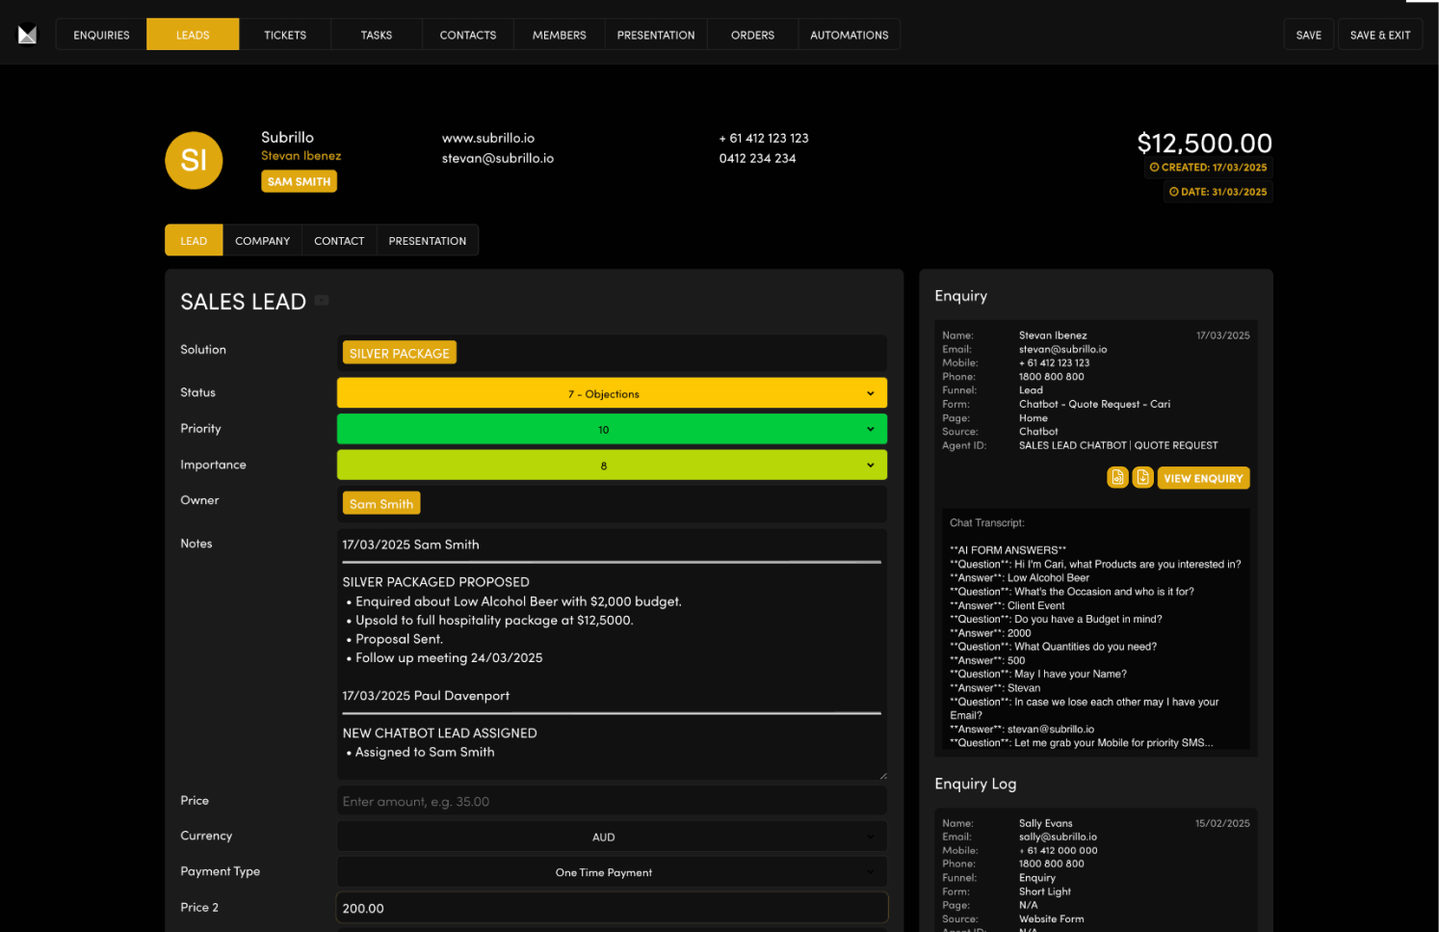
So let's have a look at a new sales inquiry that has come in from a chatbot lead. The status here is at the proposal stage, but you can see other stages from outreach through to sold. This is accompanied by the priority score, which reflects the urgency of how soon it must be attended to and the importance which is the impact that it will have for example, on the salesperson's monthly pipeline or on the project sprint.
So that's SPI scores, but how does the agent update the SPI scores from a chatbot conversation to the MOBLE CRM? Well, it does this with a bit of magic behind the scenes when it will summarize the conversation, but you can do this with the KB tools too, allowing advanced users to define and edit the 10 to one values for various functions.
Notice here in the prompt templates that there is a KB tool for the status, priority and importance for each of the sales leads, support tickets and project tasks.
If you want to include these for your chatbot, you can just copy them and paste them to your KB tools. Just copy the entire thing and paste it to the bottom of your KB tools area. Just be sure the tool doesn't already exist.
Many people often ask us why we let customers edit this information when it's connected to the UI. Well, some advanced users do like to make tweaks to the KB tools. This is why we state “advanced users” in the label. For example, many people like to set notifications like sending an SMS notification when a support ticket needs escalating to a manager or triggering a voice bot follow up phone call when certain scores are achieved.
You don't necessarily want a voice bot to call every lead or inquiry. You might only want it to call when the importance level is eight or when a meeting or interview has been booked.
The opportunities are endless and this is why we like to make the KB tools editable, and this is also why we like to have priority and important scores with arbitrary values.
Food for thought. I suspect I might have just inspired a few more people to become advanced users, and if you are a beginner, just know if you are using an out of the box chatbot, you won't need to use the KB tools at all. They will be set up for you, and if you want to become an advanced user and really see what's going on, you can read the KB tools to start your journey.
So with that said, I'll just very quickly cover a couple more KB tools for our advanced users before we move on to the next part of the course.
If you are feeling you have a good understanding for your prompt writing needs, feel free to skip ahead to part five. Part five is super basic where we run through agent settings, so you can also consider playing that on double speed and push through to course completion.
As I mentioned, the knowledge base tool reflects your knowledge base selections and instructs the AI on which knowledge bases to search and in what priority order.
Never delete the knowledge base tool because this is the tool that has important instructions that reflect the selections you made here in the knowledge base section, but feel free to tweak the instructions to your needs and if you mess it up, you can also copy the original from the prompt templates and paste it back.
FYI, a little bit of tech knowledge. The knowledge base tool is what we call build time as the instructions are determined before the conversation begins, as opposed to the AI form answers tool, which is what we call runtime as the chatbot responds to live inputs during the conversation.
The AI form answers tool captures the form starter questions and dynamically informs your chatbot about the form responses so that the chatbot can use them during its conversation. This is particularly important for my quote chatbot that asks guided questions via the AI form, then generates a quote for my customers based on their AI form answers.
There are wide use cases for chatbots with AI forms from sales leads to new clients onboarding to staff interviews, even training tests.
Whatever you would've previously used a form for, you can now use an AI chatbot and with the AI form answers tool, you can be certain that everything is captured in your CRM. If you feel you need help transitioning from web forms to AI chatbots and agents, be sure to speak with us via the built for you button.
And you are now familiar with the SPI scoring tools, which as we have just covered, stands for status, priority and importance.
Another cool tool worth mentioning is MOBLE's priority and importance algorithm tool. This helps online stores prioritize and weight exactly which products to serve. This is essential for online stores with lots of products, particularly when there are lots of relevant products in the one large category and you want a level of control over which products should be served.
With a simple scoring algorithm applied to each product, you can weight the products your AI will show and put conditions around them, and you can even apply a special boost rank for products with promo codes and AI tags.
For example, you could boost products in the chatbot search results that have an AI tag Black Friday special, and you could automatically combine this with a promo code.
Of course, you can upload your product priority and importance values via a CSV or API to quickly add and edit the values and save huge amounts of time when pushing new specials and seasonally pushing different products to your chatbots and agents.
And of course speak to MOBLE if you want to use MOBLE chatbots for other online stores like Shopify. MOBLE's chatbots not only act as product suggestions, but also create quotes for B2B customers, which is a game changer for mid-market B2Bs.
For those ready to go beyond the basics and get stuck in with advanced custom prompts, remember to click the help icons for further reading. For example, here are some extra bits of learning to be aware of.
One, target JSON key value pairs. Whereas JSON keys allow you to target everything in a column, you can use key value pairs to target items with exact values, e.g. only show products in large or only show houses in Melbourne.
This is an awesome function to keep in mind. You might, for example, include such an instruction in your operations prompt.
Two, if you are using a non-MOBLE online store or CMS platform like Shopify or WordPress, you will use the product destination URL rather than the product URL to ensure your chatbot links to the pages on your website. Be sure to export your products or pages from the workshop area to get your CSV files.
Make your CSV changes like priority and importance and then import it back. Please remember when uploading CSVs back to MOBLE to prepend “import” in your file name, e.g. import_products.csv or import_files.zip.
Using the destination URLs lets your chatbots link your MOBLE knowledge base to your website or store pages, and super importantly allows you to use one chatbot on multiple websites and stores.
Keep this in mind if you're using Shopify with another CMS as it's an excellent feature that's also great for automations and integrations.
Four, consistency is key. Remember, every detail you include makes your chatbot smarter and more effective. Don't add new parts to your prompt that might conflict with another experiment. Test and refine your prompts until you get the perfect balance for your business and beginners.
You can just use the prompt templates and be sure to copy and paste the KB tools you need to log your chatbot conversations to your CRM.
Okay, that's our comprehensive guide to writing prompts for your AI chatbots. Remember, if you want to speak with us to write your prompts for you, click the built for you button around the platform. Our AIs will log your quote request and book a meeting with our human experts.
Remember, when you master your prompts, you master your AI. With these tips and tools, you are now equipped to write expert level prompts that drive exceptional customer interactions.
Next, we'll move on to part five where we quickly cover general agent settings to fine tune every aspect of your agent's behavior.
Customise Your Agent Settings
You’ll configure greeting messages, farewell messages, rephrases, response lengths, tone, language, persuasion level, vocabulary, customer avatars, swarm options, header placement, voice bot settings, and action buttons.
Full Course Transcript
PART 5 - AGENT SETTINGS
Welcome to part five, agent settings. In part five, we'll race through each key setting to fine tune your AI chatbot.
This is an extremely basic part of the course, so use the timestamps to skip ahead or just use the videos you need by clicking on the help icon next to each feature.
One, greeting. First up is the greeting. This is the initial message that appears in your chatbot speech bubble. Make it warm and inviting. For example, “Hi, I'm Kari, ready to shop?” This sets the tone for your conversation and immediately introduces your chatbot's personality.
Two, the farewell message. This appears at the end of the conversation. It's a wonderful place to include a final call to action. I always encourage referencing the action buttons. For example, to encourage a calendar booking, you could write something like, “I hope this helps. Why not click the book a meeting button below to chat to our human experts about your quote?” Use the farewell message as an opportunity to reinforce your desired next steps.
Three, rephrase.
If your chatbot isn't sure what the user means, it can prompt a rephrase. A good example is, “I'm not sure what you mean. Could you rephrase that and I'll give it another shot?” This ensures clarity and keeps the conversation moving forward.
Four, placeholder.
The placeholder is the text shown in the input box where the customer types their message. A simple example is “Let's chat.” It helps guide your customers on what to enter and sets a friendly conversational tone.
Five, response length.
Response length controls how long the chatbot's answers are. You can choose from short, around 500 characters, shorter, approximately 380 characters, or shortest, about 160 characters.
Experiment with these settings to find the perfect balance for your interactions.
Six, language. Select the language in which your chatbot will start the conversation and fall back to if needed.
This ensures your chatbot communicates in the language your customers expect.
Seven, tone and style. Tone and style lets you control the personality and writing style of your chatbot. Choose a tone that reflects your brand, whether it's caring, formal or humorous, and a style that suits your communication needs, such as informative or conversational.
Eight, persuasion. Persuasion sets the level of sales aggression from light persuasion for gentle nudges to moderate for balanced arguments and strong for high intensity call to actions. Choose the level that fits your customer's stage of decision making.
Nine, vocabulary.
With vocabulary, you can add specific words or phrases that reflect your brand's dialect or style.
This helps your chatbot speak in a manner that feels natural and personalized to your audience and can be particularly fun when making an AI persona of a member of staff that speaks in their exact dialect and colloquialisms.
Ten, customer avatars. Customer avatars let you tailor your chatbot's responses to specific customer segments. Assign an avatar to your prompt if you'd like the conversation to resonate with an intended audience. Read the help in the avatar section for more. This can be excellent for both landing pages and marketing campaigns.
Eleven, show in header. For MOBLE website customers, choose whether your chatbot's icon appears in the website header. If you don't have a MOBLE website, refer to the AI settings tab in the top bar to choose your preferred deploy option.
Twelve, show in swarms. You can also decide if your chatbot should appear in the agent swarm, which is the menu of chatbot icons at the top of your chatbot.
Configure these settings to maximize your chatbot's visibility and accessibility.
Thirteen, swarm label. Set a swarm label to appear below your chatbot icon in the swarm menu. Swarm label is a short descriptive name with maximum nine characters, so keep it short like search, shop, support or sales depending on your requirements. You could also choose to use the agent's first name.
Fourteen, sort order. Set the sort order to determine the sequence in which your agents appear in the swarm menu.
Remember, one is the leftmost position.
Fifteen, default to voice bot and voice bot headline.
If you want your chatbot to start with an AI voice bot, enable default to voice bot. This replaces the chatbot with a voice bot form that captures name, email, and mobile before triggering a call to the customer. Also consider setting a voice bot headline to introduce your AI voice bot with a nice lead in statement.
Sixteen, action buttons. Finally configure your action buttons.
These prominent buttons appear directly under your chatbot serving as call to actions. You can choose to display one or two buttons. For example, you might have a book a meeting button in your accent one color or a contact us button in your brand's main color. One action button is highly recommended to guide your customers on what action to take next.
That concludes our comprehensive walkthrough of chatbot settings. With these features finely tuned, your AI chatbot will deliver an engaging and seamless experience. Next in part six, we'll show you how to deploy your chatbot by integrating it into your website. Thanks for watching so far and let's keep building.
Deploy Your Chatbot Across Your Website
You’ll deploy your chatbots as inline embeds, popup drawers, or header agents. You’ll test layouts, adjust colours, review customer feedback, and learn how to update knowledge base content via JSON or FAQs for fast iteration.
Full Course Transcript
PART 6 - DEPLOY YOUR CHATBOT
Welcome to part six, deploy your chatbot. Here you'll learn how to launch your AI chatbot across your website, ensuring it's accessible and engaging wherever your visitors are.
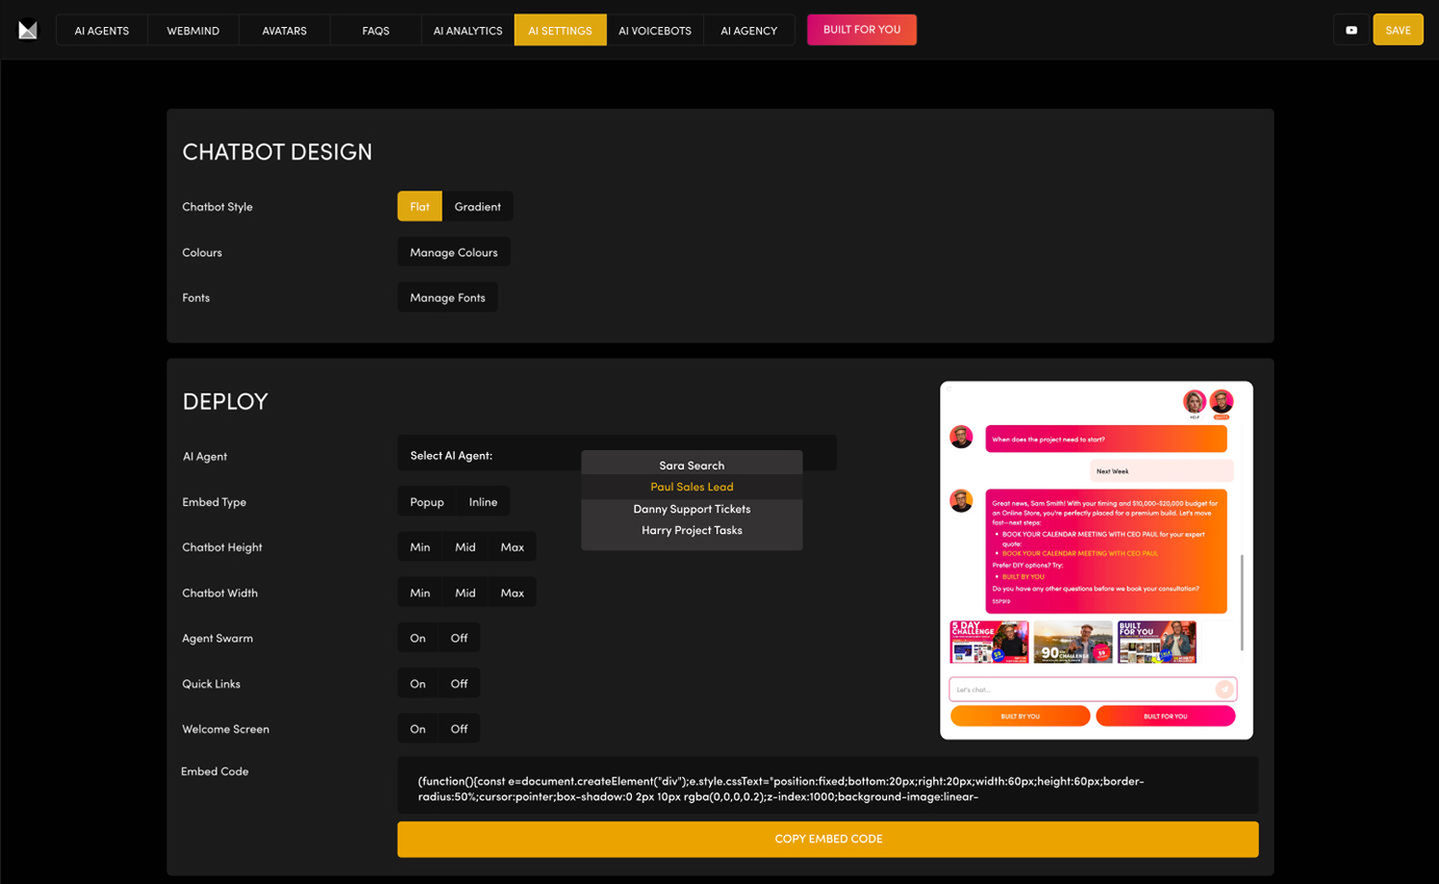
To deploy your chatbot, click AI settings in the top bar and scroll down to deploy.
You have two embed options: either to embed your chatbot as a bottom right popup or to embed your chatbot inline on any website page. The deploy as a bottom right popup option is a great option if you're using a swarm of agents and want to let customers navigate to their particular need.
The embed inline option allows you to embed your chatbot anywhere on any page and is great for task specific chatbots that work alone and don't require a swarm to work as a team, like for example, a sales chatbot to replace those old school web forms before we had AI forms or maybe a client onboarding chatbot that sits behind a paywall or a staff training chatbot behind a password protected page, and a common use case is to use a search chatbot to replace your entire website search function.
Whether your inline chatbot is for your contact us page, a dedicated sales landing page, or even a support ticket section of your website, embedding your chatbot inline is a fantastic way to introduce AI to all of your business operations.
Simply copy the provided embed code and paste it to your website's HTML or CMS editor.
As we discussed earlier, MOBLE website customers can also place your AI agents in the header of your website, displaying your preferred chatbot icon alongside your header menu navigation for high engagement.
To set a chatbot in your header, first select the AI agent icon that you would like to display. Enable the show in header option and press save. Then back in the AI settings, select header and click customize header. Then select AI agents and your AI agents icon will replace your old school website search icon and be nicely positioned in the header on every page of your website.
It opens up your entire swarm of agents offering next level AI interactivity on your website. Also, notice back in the AI settings area, you can customize your chatbot drawer colors.
Have a play with the color swatches safely, knowing that you can reset to the default light or the default dark color settings that your AI generates from your branded theme colors over in the colors area, so there is lots of scope to make your chatbot just right wherever you will place it.
TOP TIPS
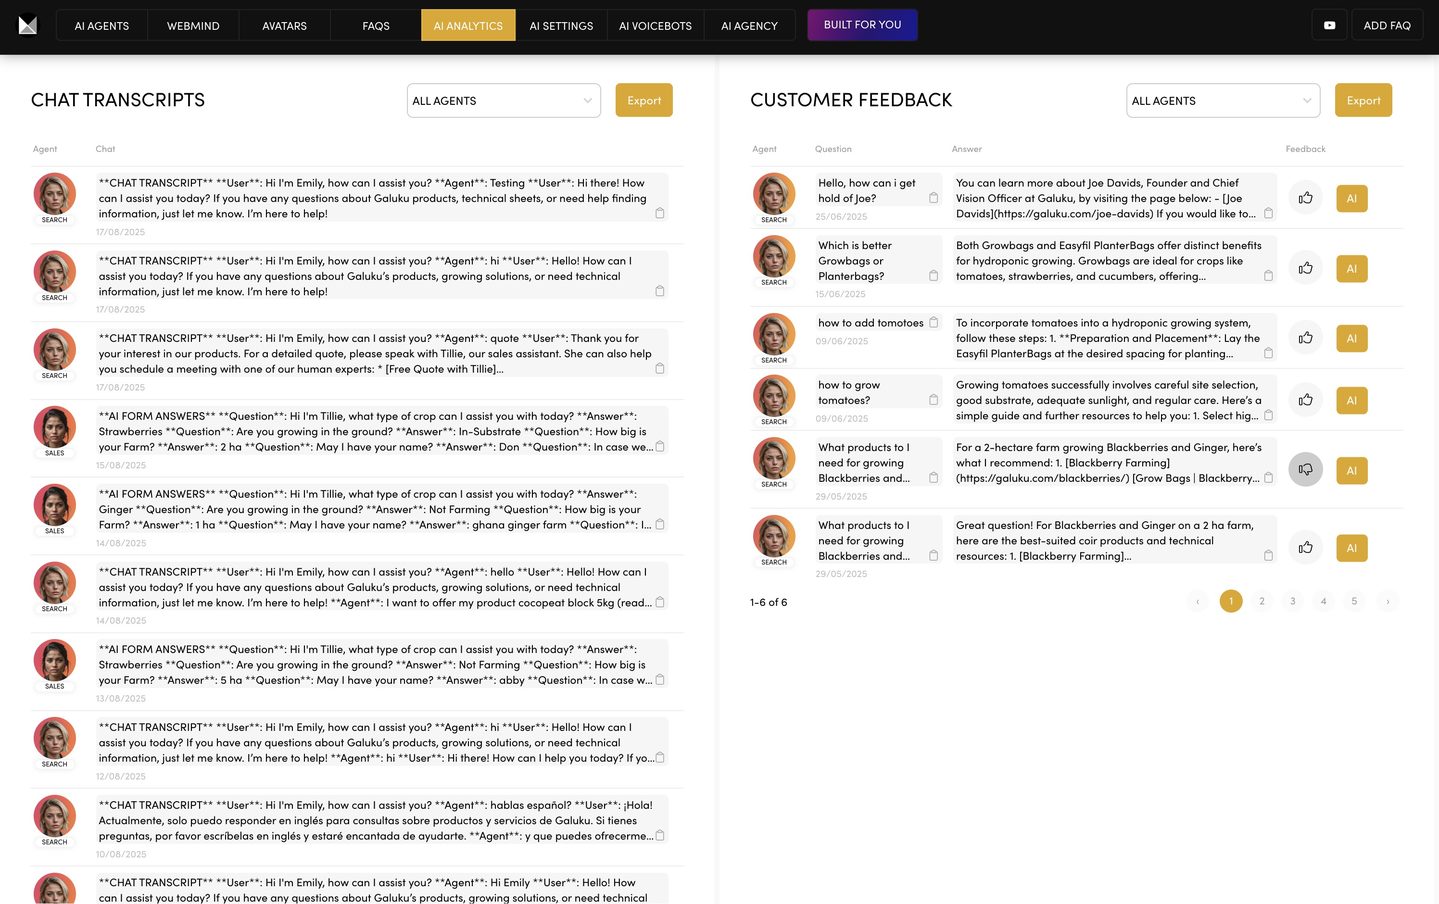
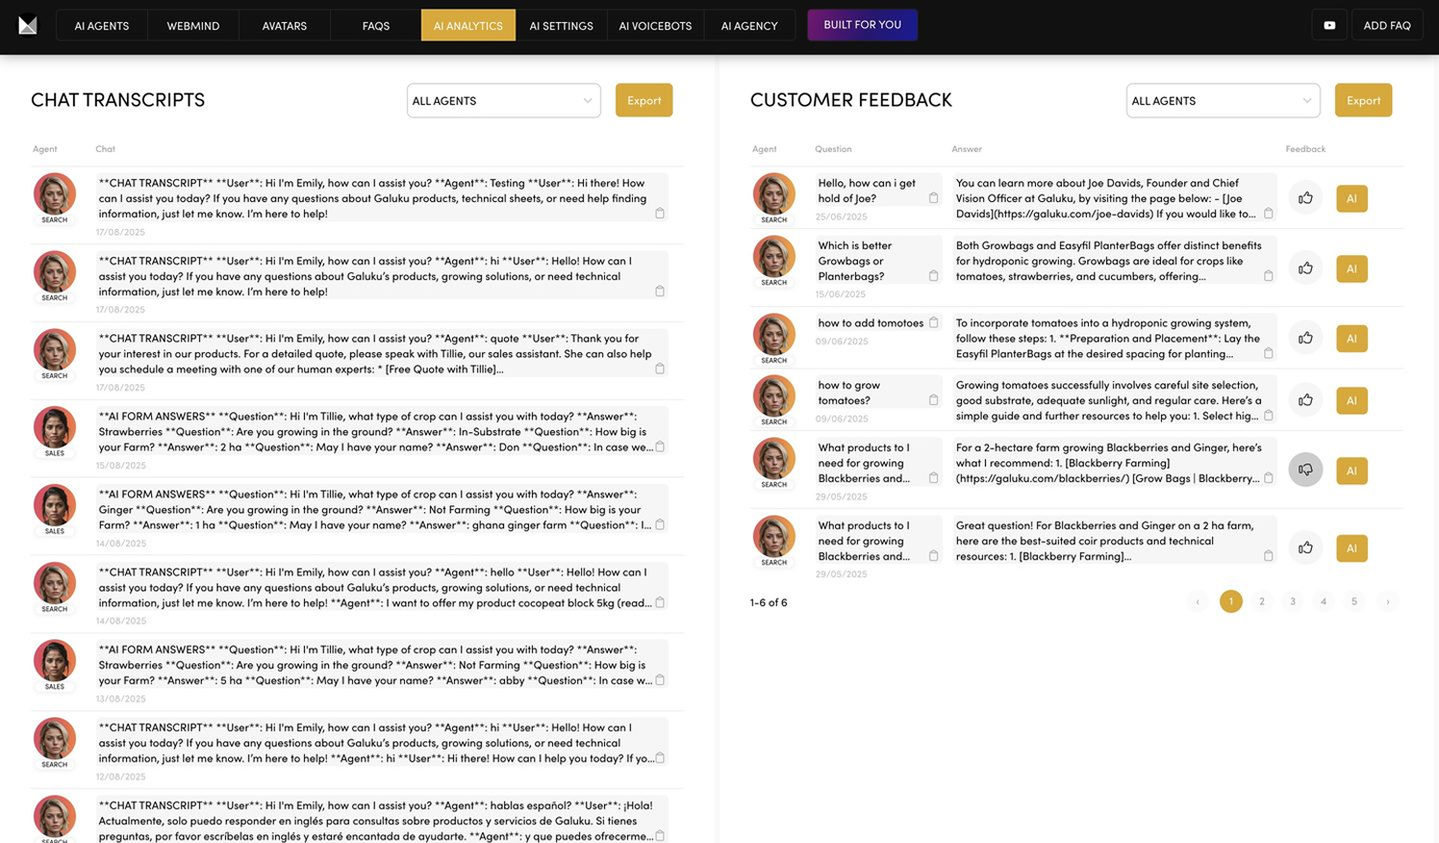
Another option in the AI settings area that's great when you first launch your chatbot is customer feedback. This will allow you to see all of your customer's feedback, which can be particularly handy in your initial chatbot beta launch.
You can click AI analytics in the top bar for a complete log of chats and customer feedback for all your agents, and when your chatbot is fully tested, you can return to AI settings to turn your customer feedback off.
My top tip when testing your chatbot and reviewing customer feedback is to continually revise and iterate your knowledge base content, and a quick way to do this is with FAQs.
You can use the FAQs to quickly add new content to your knowledge base while your team takes time to rewrite sections of your knowledge base or add completely new content. FAQs give you a method to add new content quickly while you wait for your content team.
Just be sure to make FAQ your priority one knowledge base throughout beta, just like how we covered earlier in the knowledge base section of this course.
And another tip for editing your knowledge base is to edit the JSON database directly. Rather than edit website pages or remake PDFs, you can manually edit the content, which can be super efficient if you want to update or chop out content like old employees or any obsolete content. For page content, go to pages, click settings, and you can see all of the content that has been scraped from your website.
You can amend the content and press save. For PDFs, go to files, search for documents, click edit, and if you haven't already, click generate and text will be extracted from your PDFs and added to your knowledge base. You can edit that obsolete content and press save. Just remember to go to Webmind and press run to update the language model just like we covered earlier in the course.
And finally, before you go live, do remember to test your chatbot deployment across all devices, check its appearance as a bottom right popup or embedded on different pages or as part of your website header. This final review ensures a seamless responsive experience for every visitor, and if you are ready to go live, you can now visit your website to deploy your chatbot and transform your customer's experience.
Okay, thank you everybody. That is a wrap and I hope AI Paul has looked after you and I hope you've enjoyed building your first AI on MOBLE. Now we're adding new agents and prompt templates all the time, so if you have an idea for a new agent or need help on a particular prompt template, be sure to let us know in the comments or via our feature request chatbot. And do let us know in the comments if you'd like to see us building any of the agents from scratch, as that could be valuable content for everybody.
So please do let us know and of course, click the built for you at any time if you want something custom built for your business by our community of AI experts. With that said, thank you for watching.
Why This Challenge Matters for Your Business
Whether you continue with a Built By You approach or decide to upgrade to Built For You or Built With You, you’ll understand the moving pieces, the possibilities, and the language of AI Agents well enough to make smart decisions for your organisation.
How to Make the Most of AI Paul During the Challenge
The more you experiment as you watch, the faster everything will click. Don’t worry about watching the entire 54mins in one hit, just get started, as soon as you Add Knowledge your chatbots are ready to test — the Challenge is designed to encourage iteration and improvement.
Ready to Start the AI Chatbot Challenge?

WHAT'S NEW? ADD AI TO YOUR WEB PAGES.
Discover Chatbot Embeds
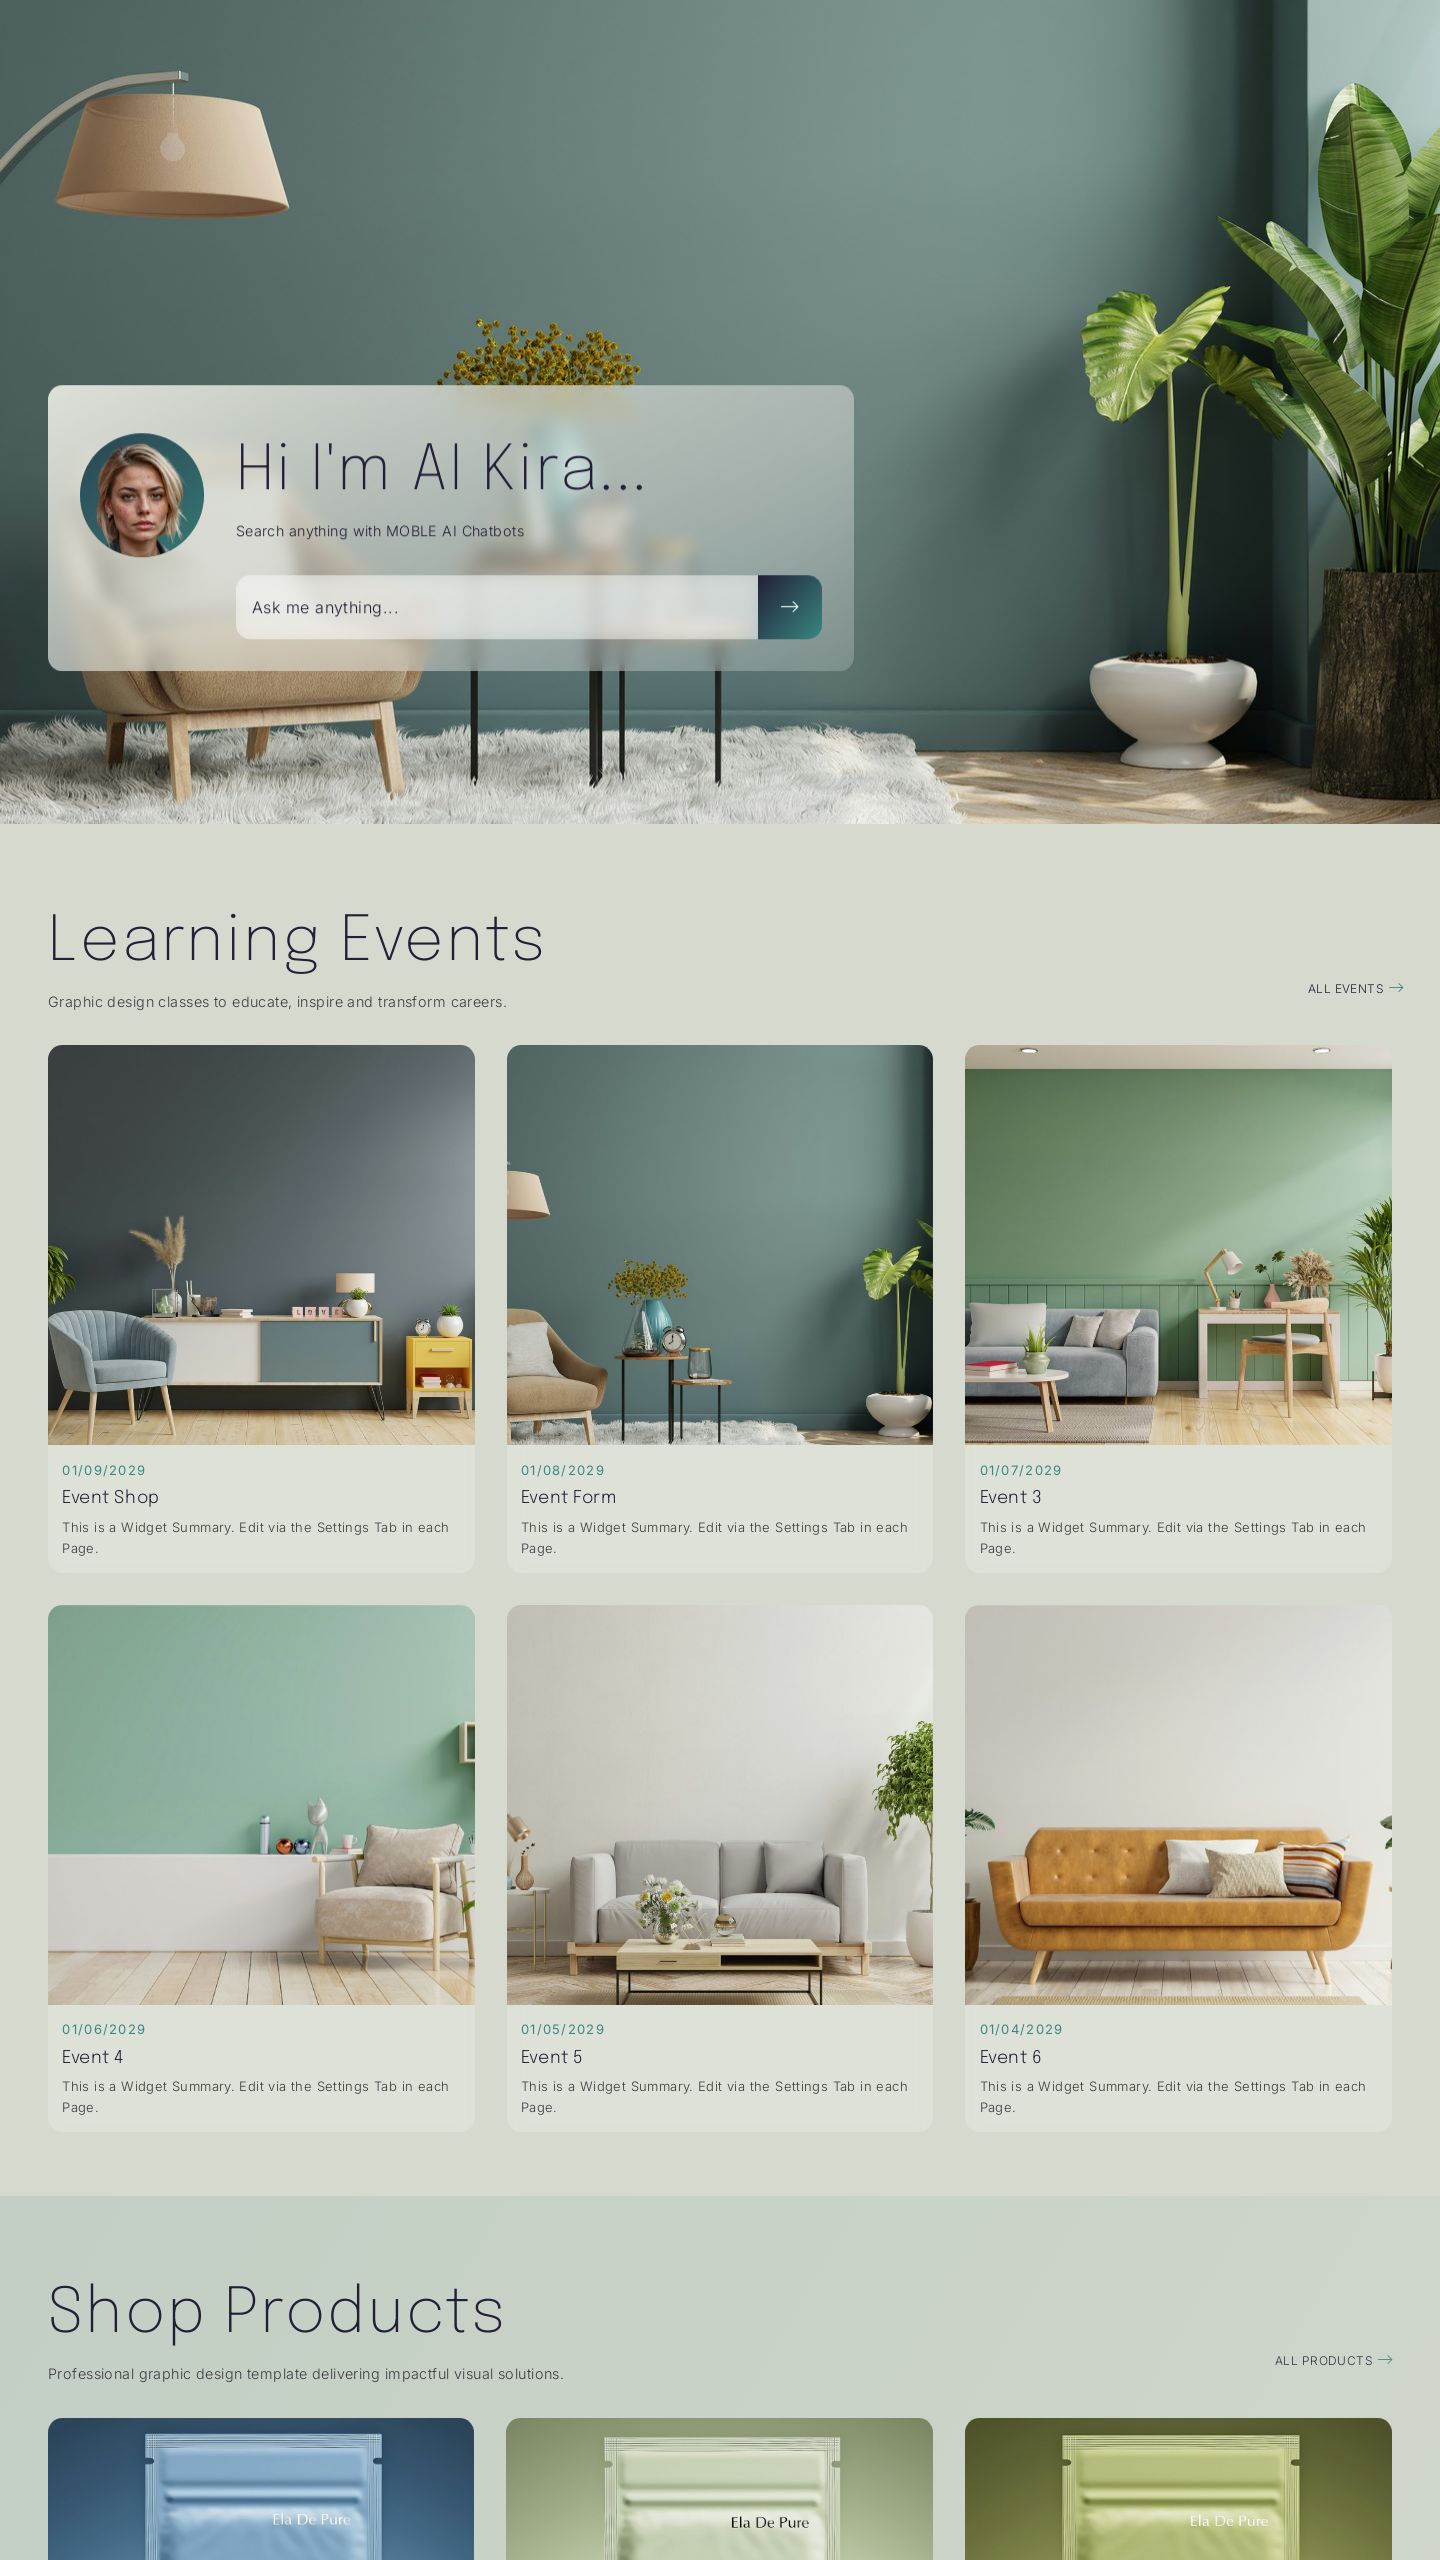
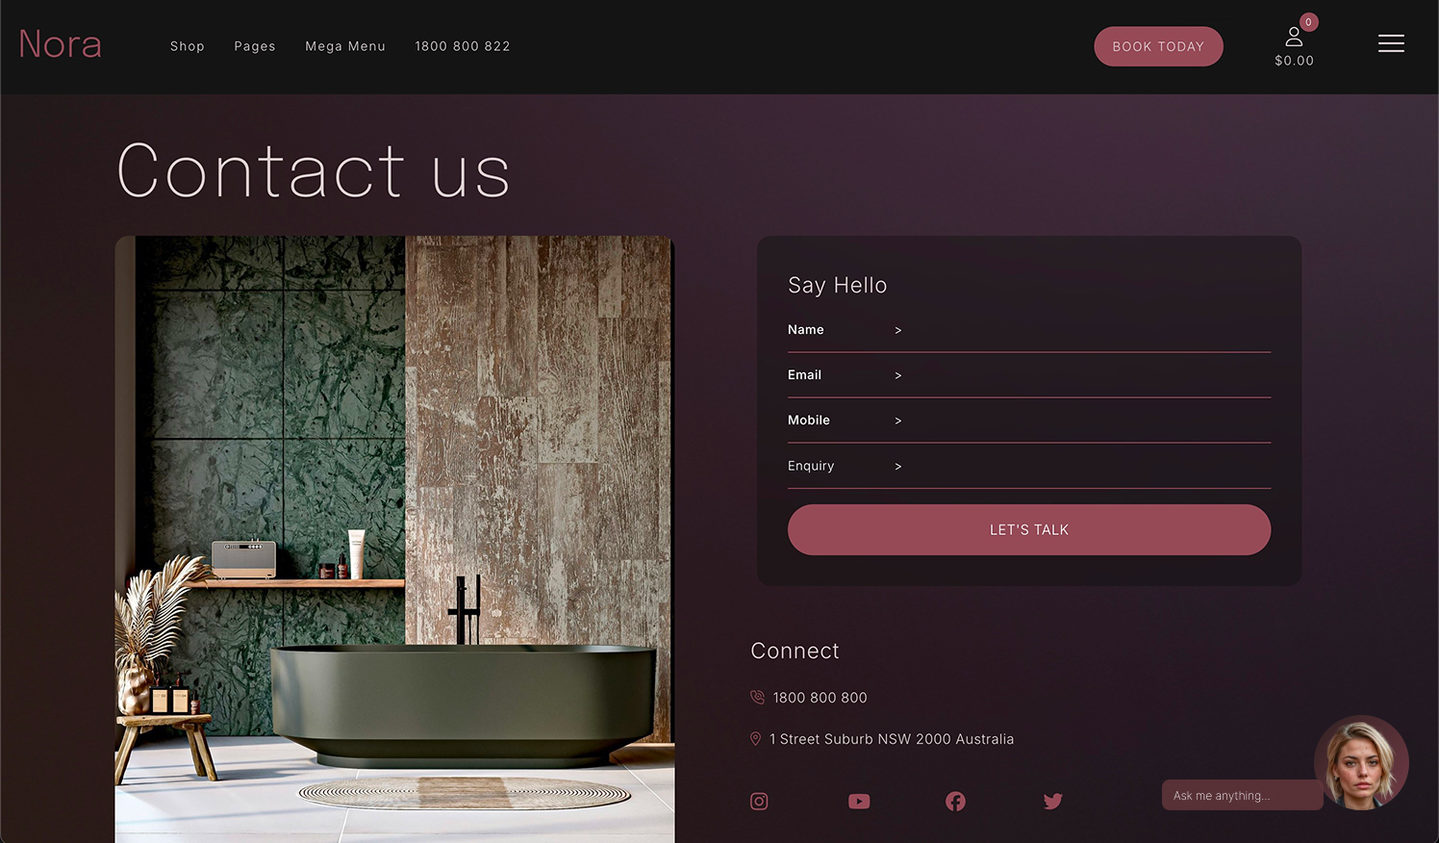
Born on MOBLE CMS, now embeddable on any website. Choose from 7 Chatbot Embeds (always adding more). Each embed begins with a simple prompt and then opens the slide-in Chatbot Drawer for the full conversation—clean UI, zero clutter.
BLOCKS & LAYOUTS
- Blocks: Drop into any column — Input Bar, Agent Block.
- Layouts: Full-width page layouts — Hero Bar, Hero Banner, Hero Agent, Chat Dock, Corner Popup.
BRAND CONTROL
- Match your colours & fonts; set heights, widths, and corner radius.
- AI Swarm — deploy one specialist or a swarm of team chatbots that work together.
SETUP
- Choose your Agent then select an embed option.
- Copy the iframe code from Deploy and paste into any page or CMS (set drawer width and transition speed).
Outcome:
Frictionless entry points that match your site design and user behaviour.
INPUT BLOCK
Block
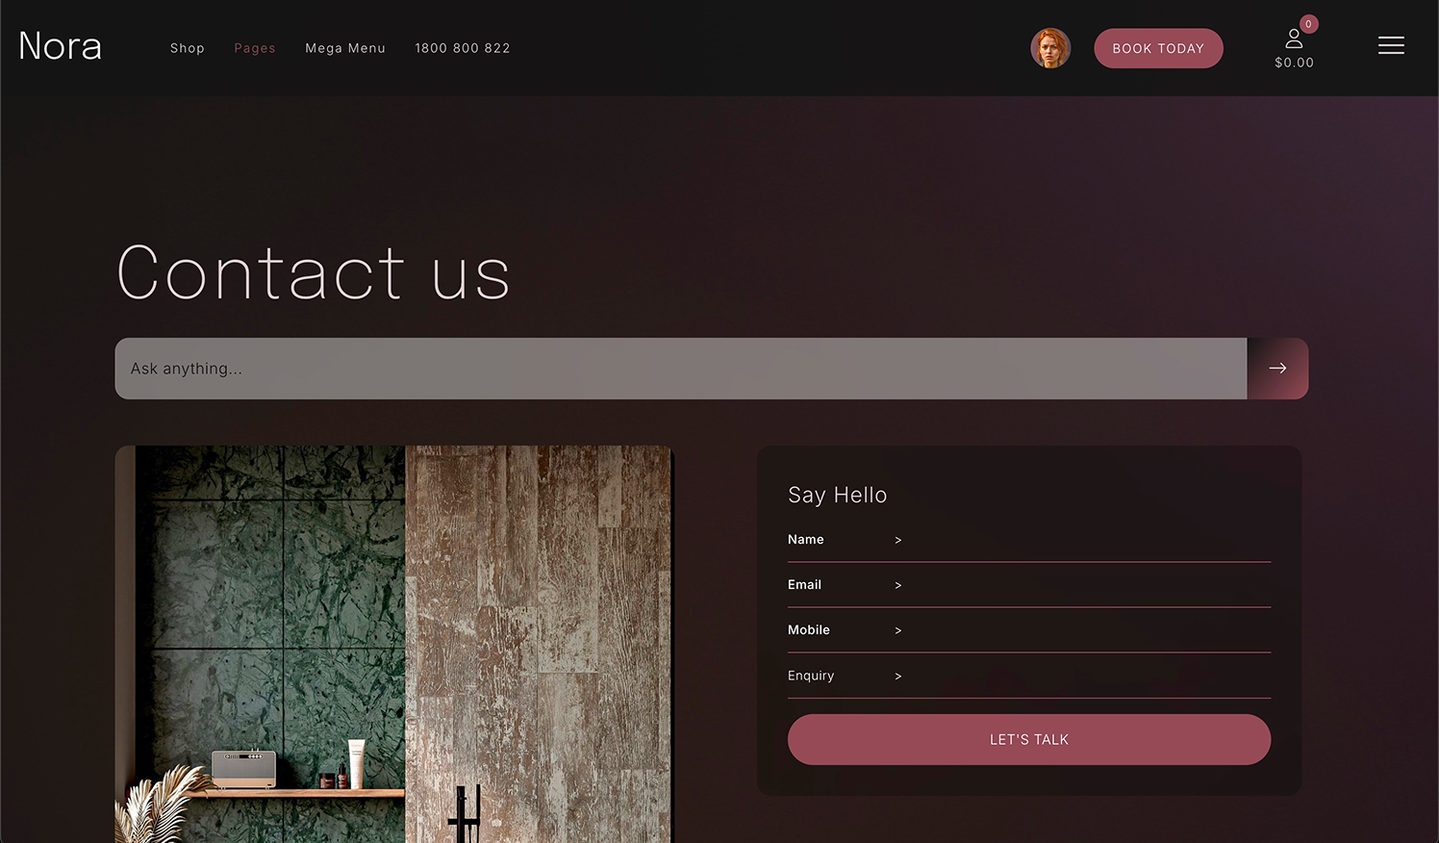
A minimal input you can drop anywhere—great for blogs, help pages, and footers and sidebars.
AGENT BLOCK
Block
Agent on top, input below—perfect for product pages, pricing, demos, and feature highlights.
HERO BAR
Layout
A thin full-width strip across your hero—great for headers, docs, and help centres.
HERO BANNER
Layout
Prominent hero with headline and media—ideal for launches, campaigns, and landing pages.
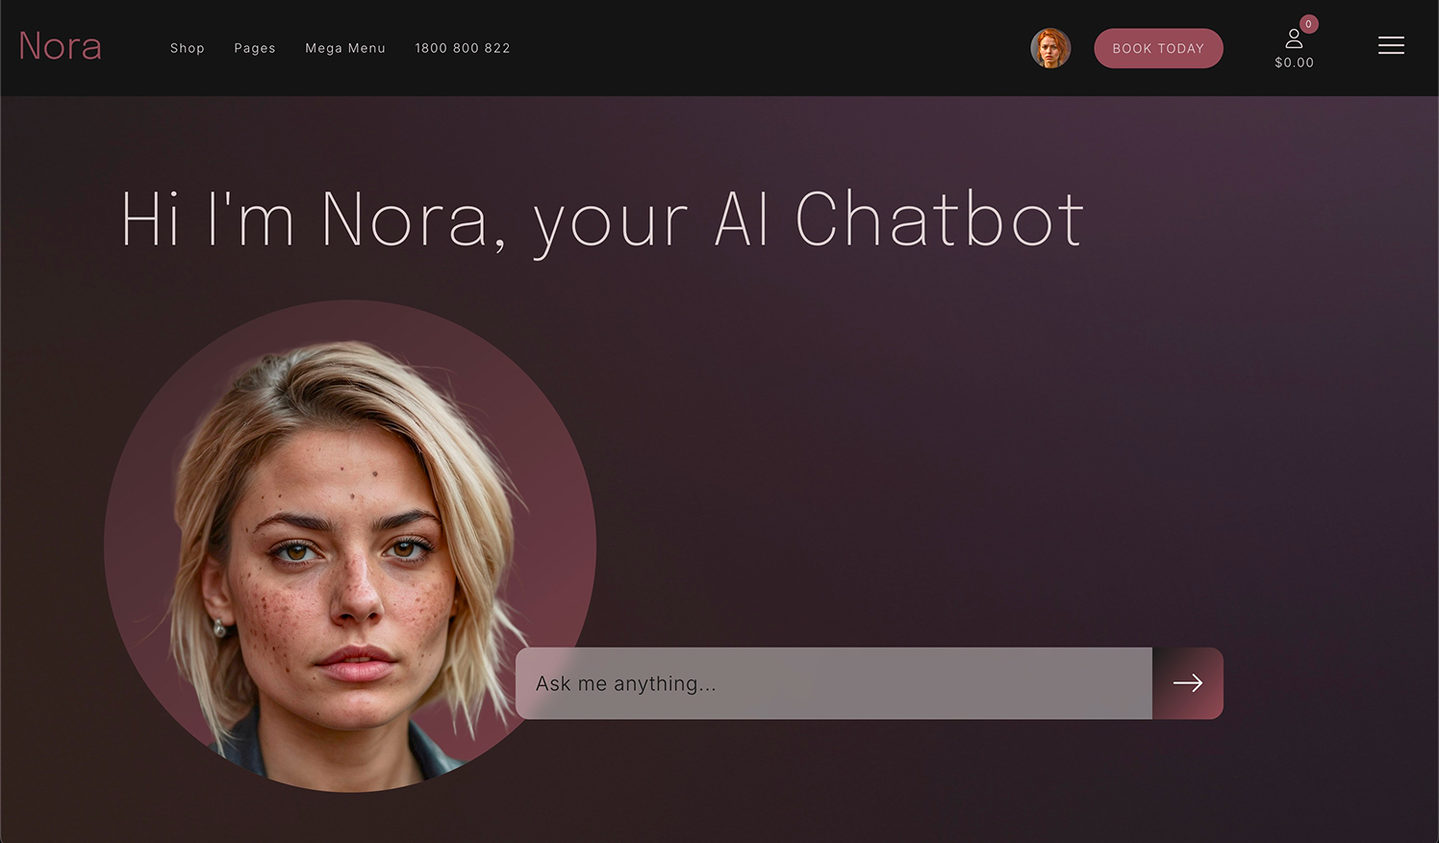
HERO AGENT
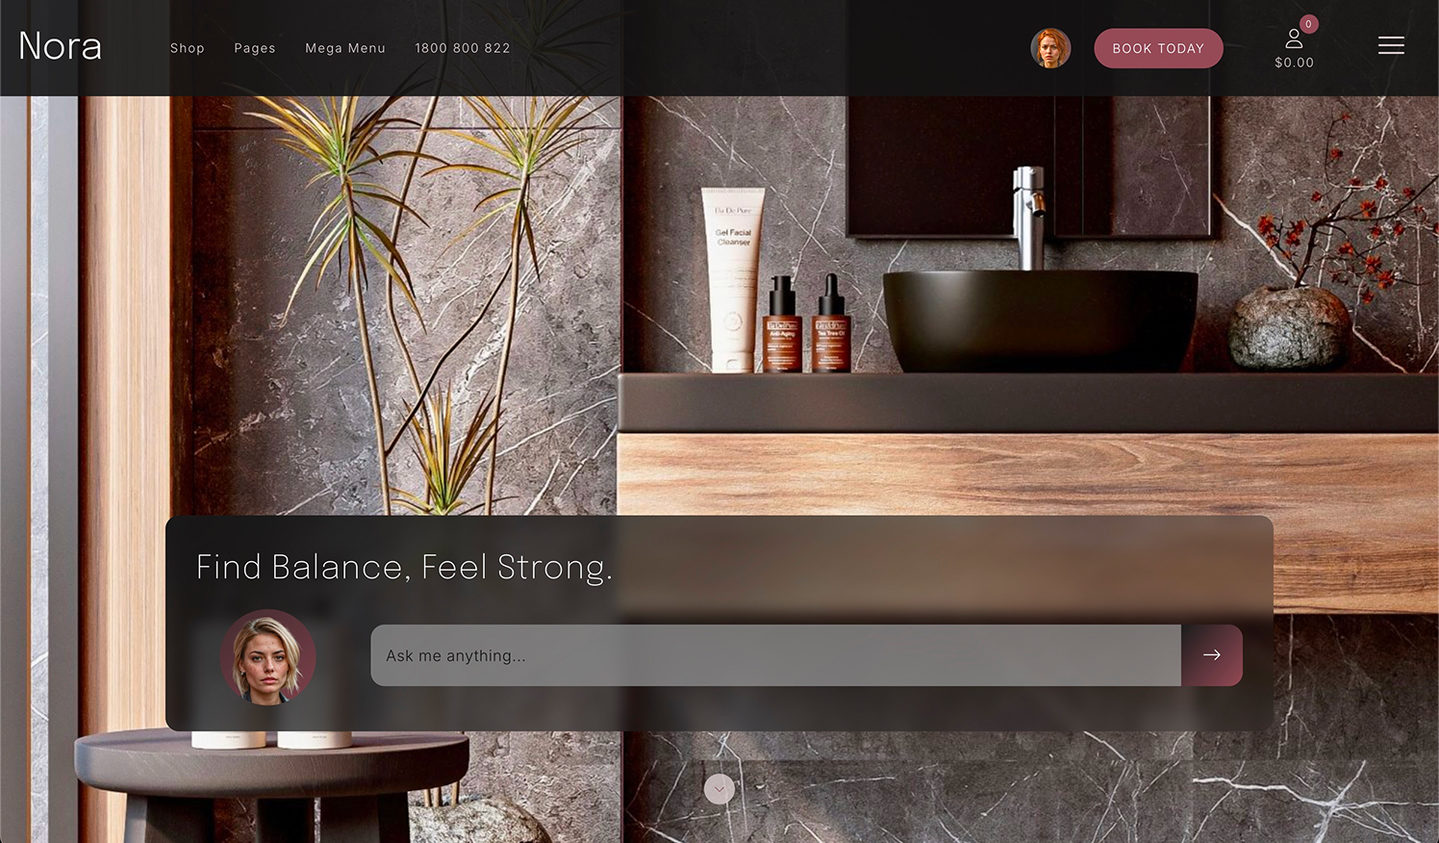
Layout
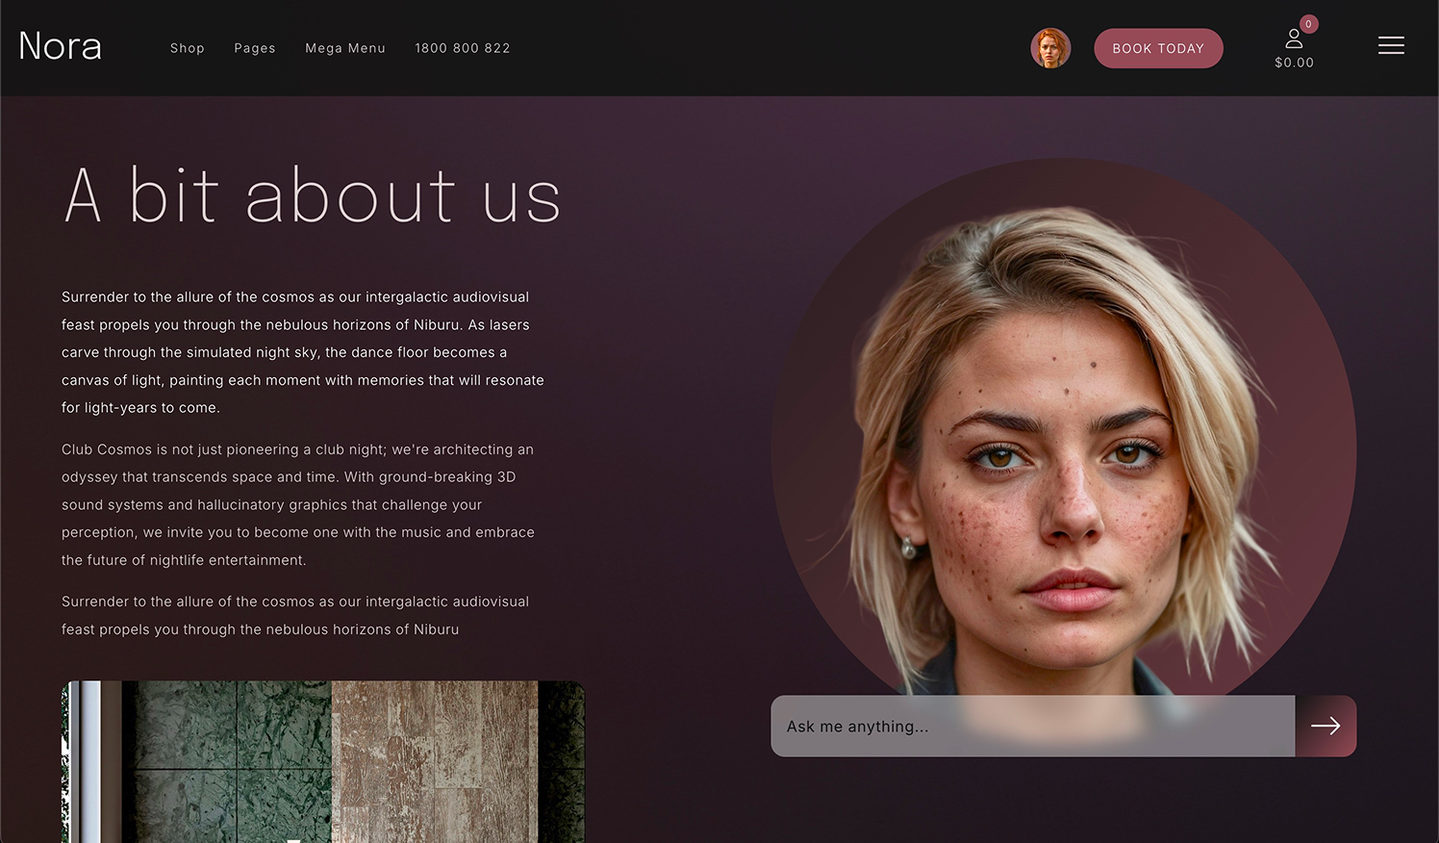
Large immersive hero with agent left and input right—great for demos and showcase moments.
CHAT DOCK
Layout
Embed the Chat Drawer onto a page to offer a ChatGPT-like prompting experience.
CORNER POPUP
Layout
Familiar bottom-right popup opened by a launcher—lightweight, unobtrusive, and always available.
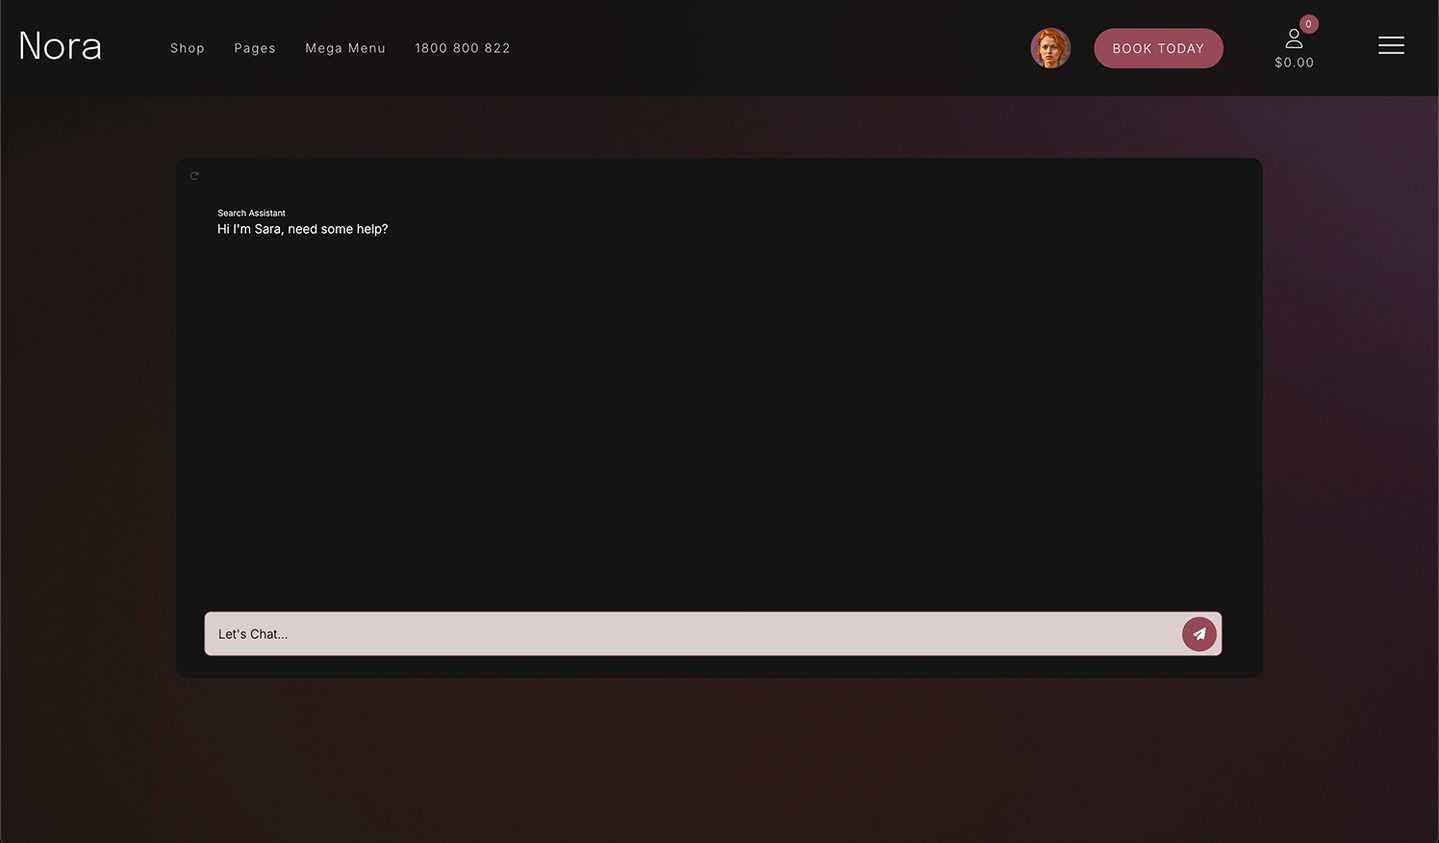
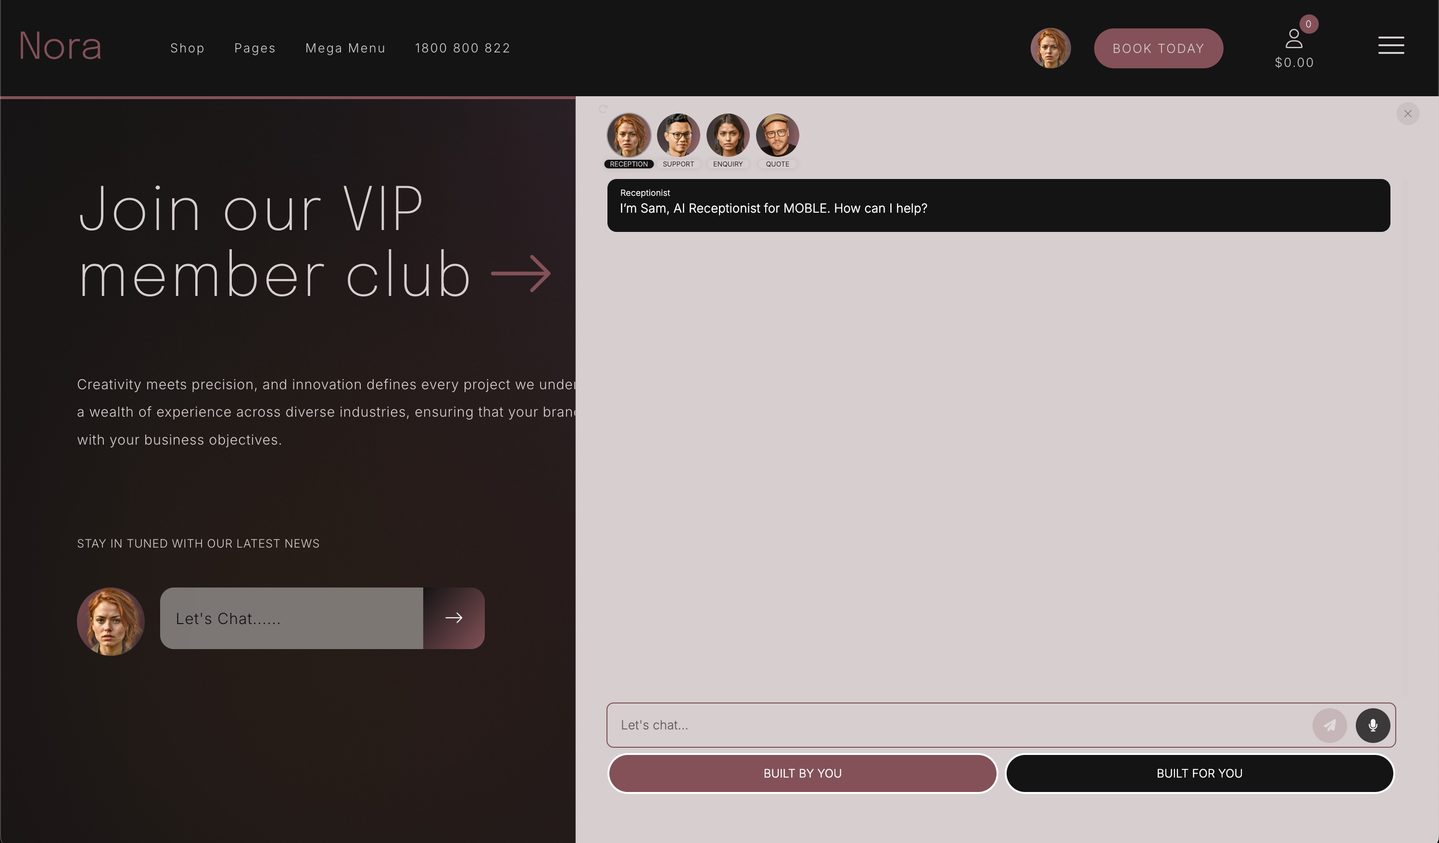
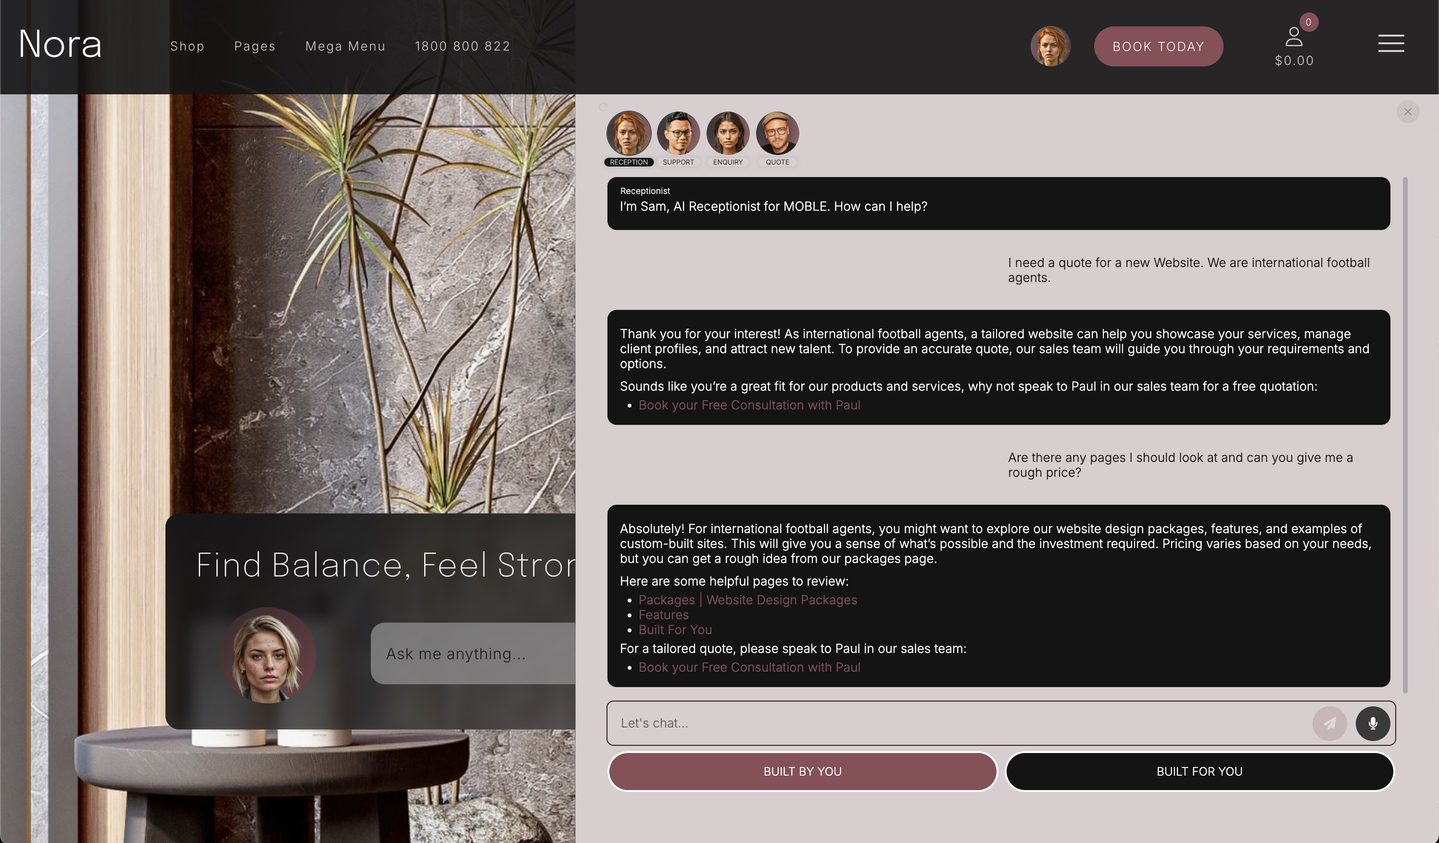
CHAT DRAWER
Slide-In Drawer
A slide-in conversation drawer after the first input—keeps context and links to other AI Chatbot team members.
One Chat Drawer for all Chatbots
All embeds funnel into the same slide-in chatbot drawer for the full conversation. The drawer links your AI Chatbot Team together for smooth hand-offs and shared context.
- Agent Switchboard — Add the Agent Switchboard to your Chatbot Drawer to browse AI Agents in your team.
- Switchboard Tool— Add the Switchboard Tool to your Prompts to instruct Agents to serve links to better suited Agents.
- Persistent thread — Drawer can open and close as users browse. Chat history persists for each agent until refreshed.
- Action Buttons — Add Persistent Call-to-Action buttons at the bottom of the drawer.
Deploy Chatbots on Any Website
Use the iFrame Builder to generate embed code for any page or CMS. Apply global styles via your site’s CSS and fine-tune behaviour in one place—fast, consistent, and brand-safe.
- Anywhere you build — embed on any website, or use the MOBLE Page Builder to drag-and-drop Blocks & Layouts anywhere on any page.
- iFrame Builder — create the chatbot, copy the embed code, and paste it into any website.
- Global Styles — inherit colours & fonts from your main CSS; control spacing and radius.
- Choose Embed Type — INPUT BLOCK, AGENT BLOCK, HERO BAR, HERO BANNER, HERO AGENT, CHAT DOCK, CORNER POPUP, CHAT DRAWER.
- Agent Swarm (Drawer Header) — toggle the team header to browse agents inside the Chatbot Drawer.
- Action Buttons — show/hide persistent call-to-actions at the bottom of the drawer.
- Customer Feedback — enable thumbs up/down and capture quality signals per reply.
- Drawer Size — set the drawer width; for CHAT DOCK, set the chatbot iFrame height.
HOW IT WORKS
DID YOU KNOW? All MOBLE Plans come with 10 ready to use AI Chatbots Templates from just $9 pm. Simply upload your Knowledge Base on signup and drop your logo, and let AI style your chatbots together with an entire Help Knowledge Base that you can run alongside you website, or build a brand new website from scratch.
CHATBOT FEATURE FOCUS
Build production-ready chatbots fast and scale with confidence. Start with 10 Templates, shape precise answers with the KB Tool Library, refine behaviour in the Prompt Drawer, and guide users with Action Buttons. Your Agent Swarm hands conversations to the right bot via Switchboard, all presented through a clean Chatbot Carousel and tracked in Feedback & Analytics.
WHY IT MATTERS
- Launch faster with templates and prompt tools—no guesswork.
- Convert more with drawer UI, carousels, and guided actions.
- Improve continuously using ratings, transcripts, and KPIs.
HOW IT FITS
- Works on MOBLE or any site via Deploy iFrames.
- Hands off leads, tickets, and tasks to your CRM/desk via Switchboard & integrations.
Outcome:
A scalable chatbot stack—easy to launch, delightful to use, and simple to measure.
CHATBOT TEMPLATES
Layout
Start fast with plug-and-play chatbots for search, forms, leads, and support.
UNLIMITED AGENTS
Block
Create as many specialised AI agents as you need—no per-user limits. Clone from Chatbot Templates.
AGENT SWARM & SWITCHBOARD TOOL
Drawer Feature
Add Agents Menu to the Chat Drawer. Switchboard routes chats to the best agent with context.
CHATBOT CAROUSEL
Drawer Feature
Let visitors meet your agents—press play for each agent’s audio intro.
PROMPT TEMPLATES & COPILOT
Prompt Feature
Start from Prompt Templates or let AI Generate Custom Prompts by learning from your Knowledge Base.
PROMPT DRAWER TOOLS
Prompt Feature
Write precise Prompts by targeting KBs, injecting JSON Keys, fields, merge tags, forms and link AI Agents.
ACTION BUTTONS
Layout
Unlock pages, files, bookings, and automations direct from chat replies.
FEEDBACK & ANALYTICS
Layout
Thumbs up/down, transcripts, CSV export, and KPIs for continuous improvement.
SUPPORT TICKET CHATBOT
Choose Chatbot Layouts
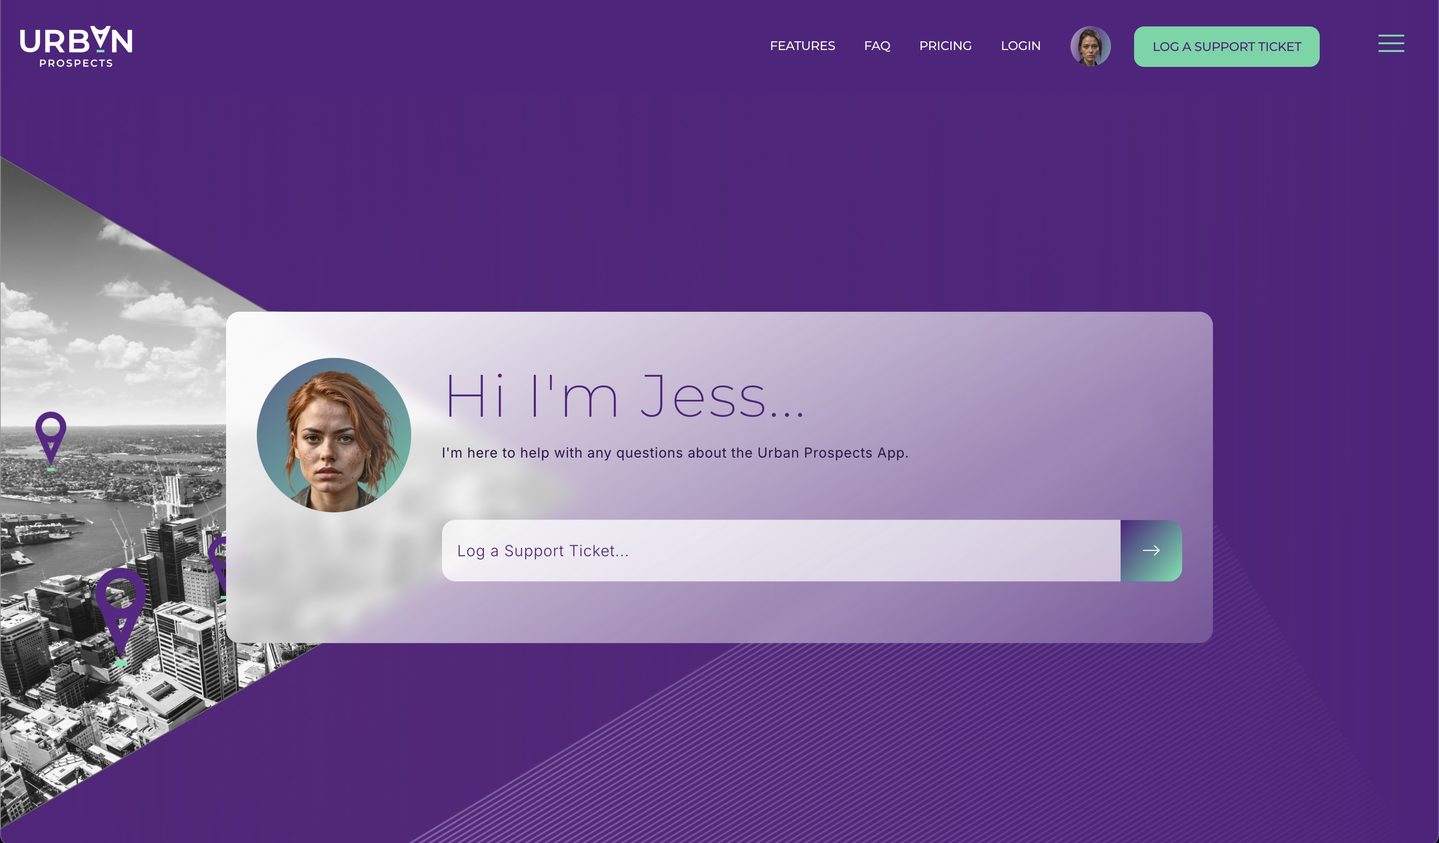
All themes include many Chatbot drag and drop layouts options to log support tickets anywhere on any page.
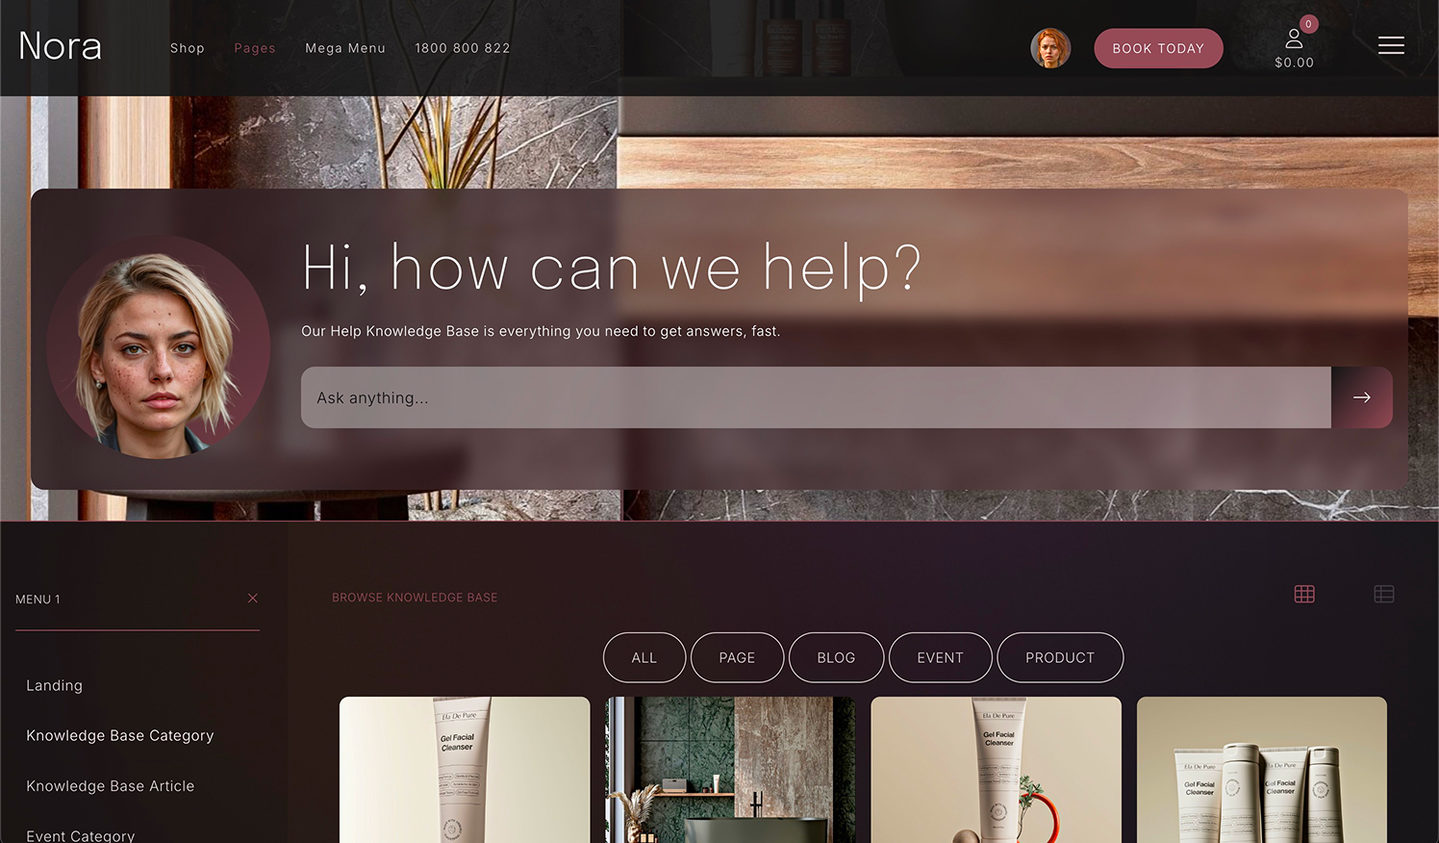
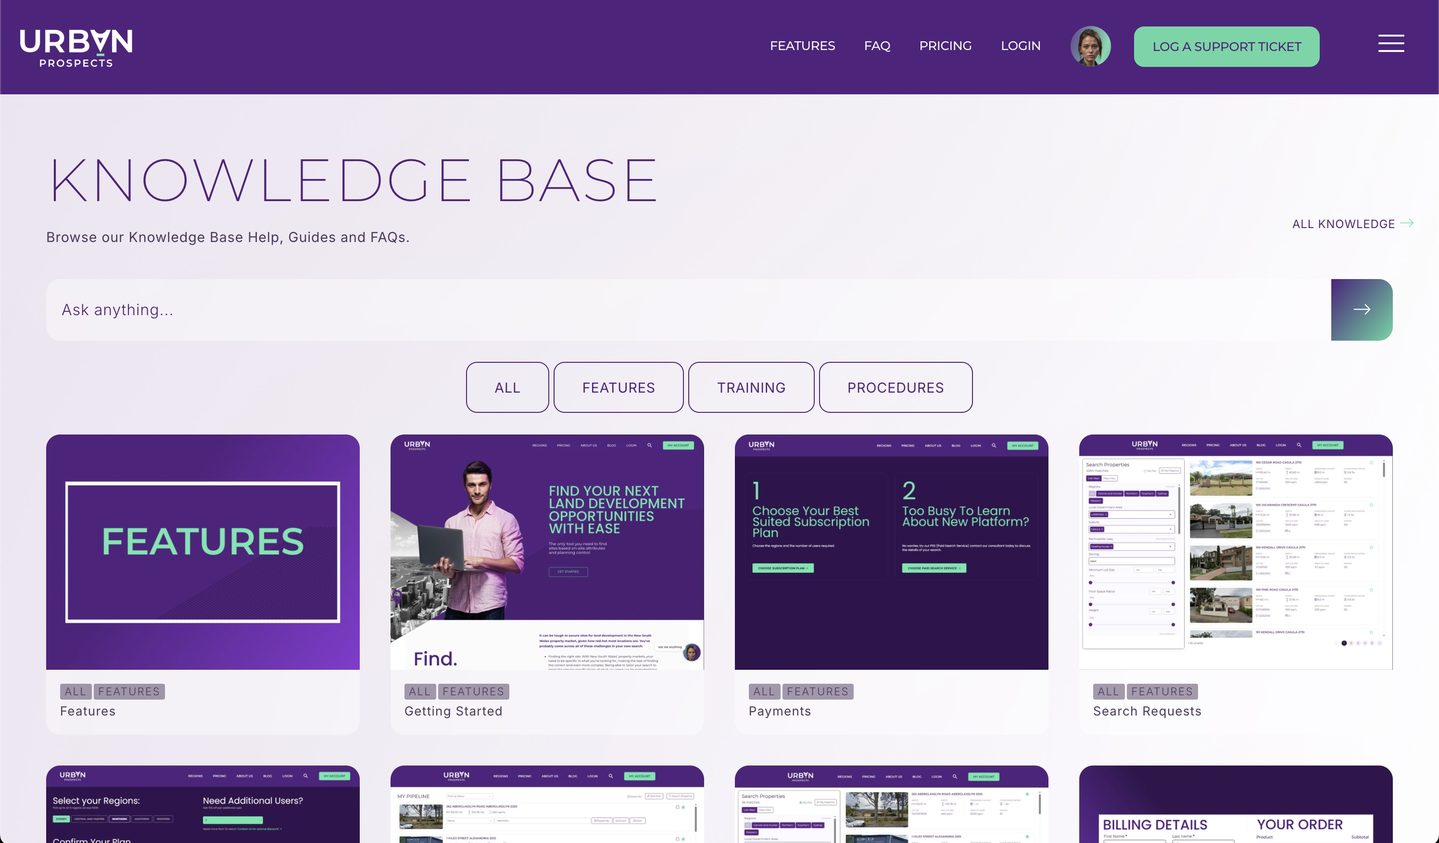
KNOWLEDGE SEARCH PAGE
Layout with Theme
All themes include a searchable Help Home page that can use a subdomain e.g. help.youdomain.com
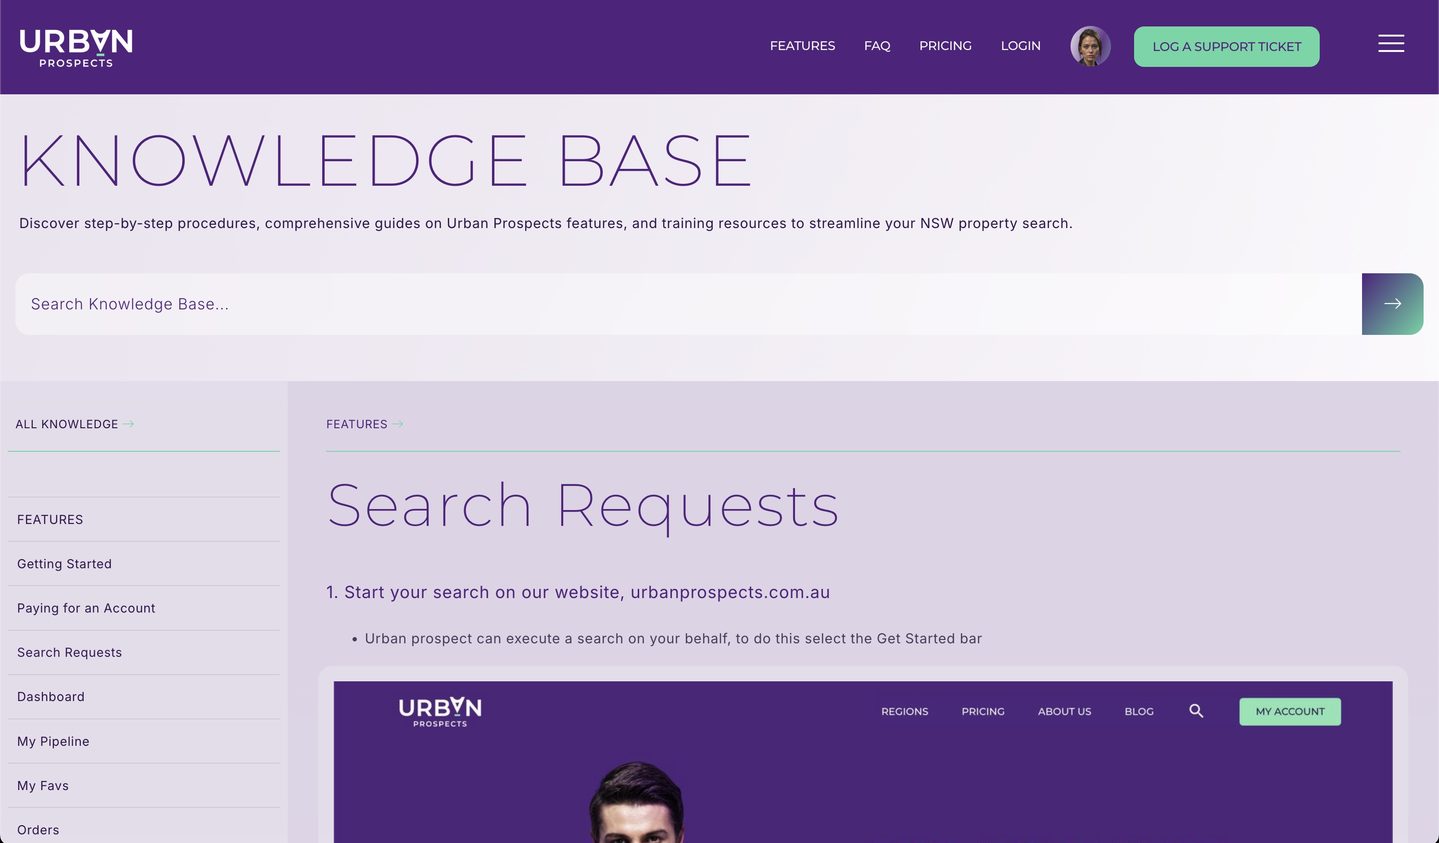
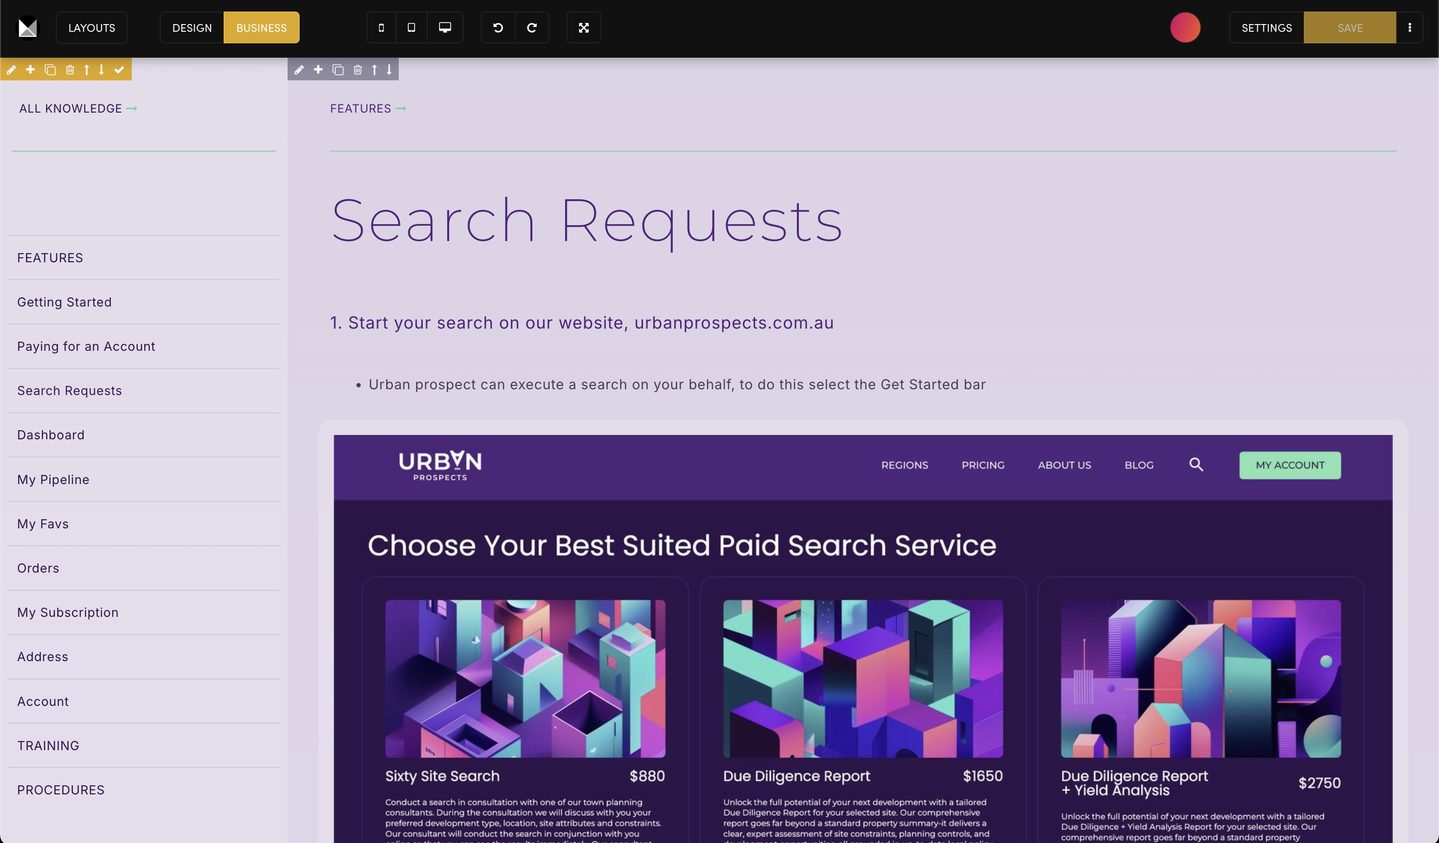
ARTICLE PAGES
Layout with Theme
Add Help Article Pages and categorise with Tags and side bard menu. Let user query with AI Chatbot Input Blocks.
MANAGE PAGES WITH MOBLE CMS
Web Builder & CMS
Effortless Manage Pages with MOBLE Web Builder and CMS. Use AI to refine Content and Images.
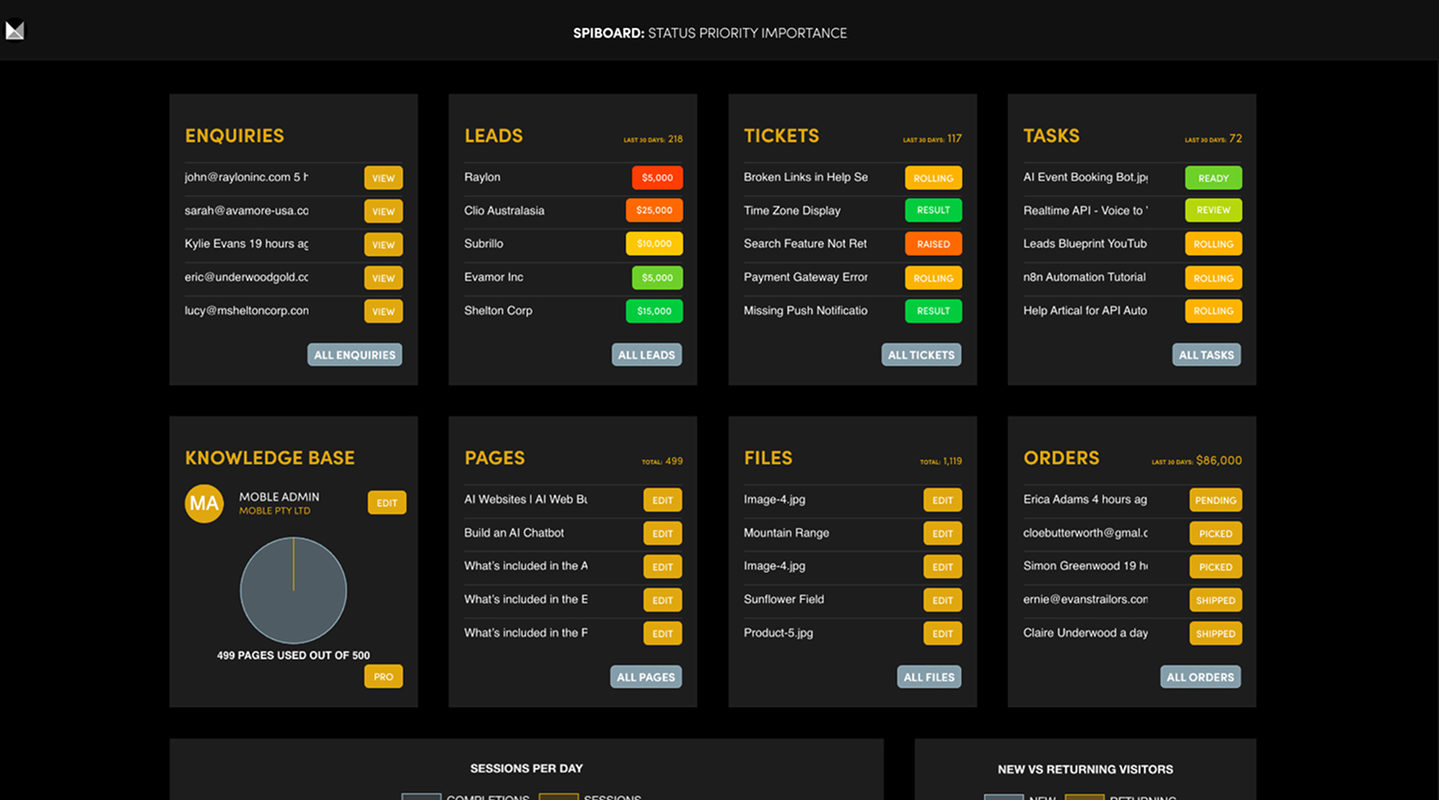
SPIBOARD DASHBOARD
SPIBoard
All Knowledge Base Enquiries are initial handle by AI. AI Leaves a SPI Score and resolves or hands over to humans.
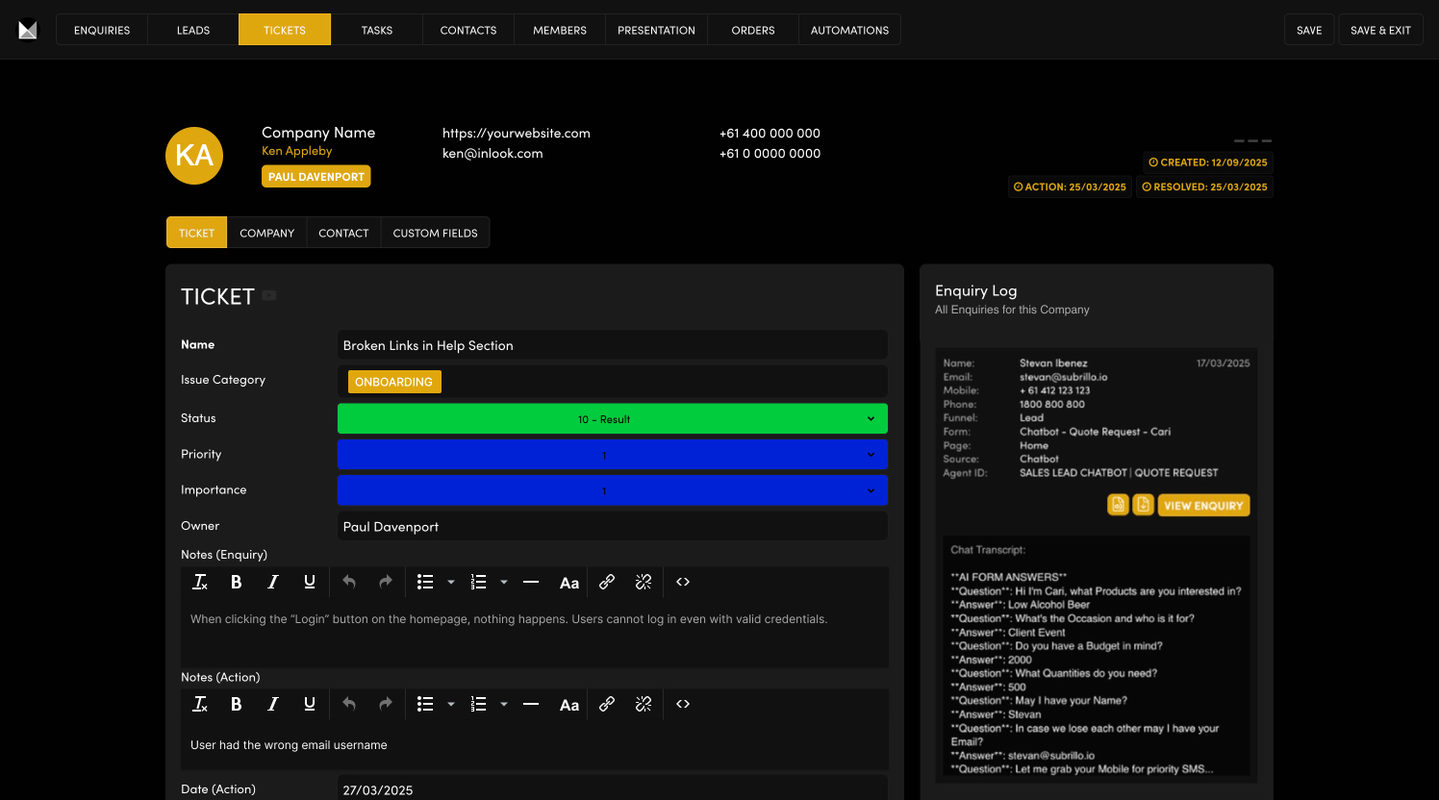
SPIBOARD MANAGE ENQUIRY
SPIBaord
Support Ticket requiring human support can be managed with full chatbot transcript and SPI Score adjusted for effortless management.
Reduce Customer Queries with a Help Knowledge Base. Choose a Theme, and AI Chatbots ready to resolve.
All MOBLE Themes include a branded, visual Help Knowledge Base. Even if your main site isn’t on MOBLE, publish a standalone help site on a subdomain (e.g. help.yourdomain.com) and keep content in sync with your AI Knowledge Base.
- Web Builder & CMS — drag-and-drop Blocks & Layouts; inherit colours & fonts for a fully branded help site.
- Add to any Website — run your Help KB on a subdomain even if your website is hosted elsewhere.
- Add Articles— articles feed your AI Knowledge Base; manage sources and tags in Webmind.
- Add Chatbots — create Knowledge Base pages for Support Tickets and Projects, and add Chatbots to Pages
- Manage Tickets and Tasks — AI Agents resolve tickets and leave SPI Scores for ease to manage human handover.
DID YOU KNOW? With MOBLE CMS you can turn your AI Knowledge Base into a visual Help Knowledge Base website—publish on a subdomain like help.yourdomain.com (no need to move your main site). All MOBLE Themes include drag-and-drop Help Knowledge Base pages with AI Chatbots embedded and ready to resolve customer queries, from just $9 pm.
HOW WOULD YOU LIKE TO BEGIN?
SIMPLE PRICING THAT WORKS FOR EVERYONE
Play before you Pay?
GETTING AROUND
SUPPORT
AI SALES LINE
AI SUPPORT LINE
GET A QUOTE
A Web Builder for Design. A CMS for Business. We serve all businesses from SME's to Enterprise. Talk with us for AI development, custom website design, website development, ecommerce websites, directories, intranets and social networks.
PRIVACY | WEBSITE TERMS | PLATFORM TERMS | © 2025 MOBLE PTY LTD

